1/12/2013

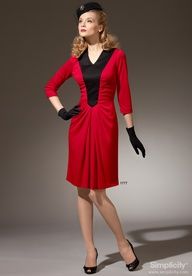
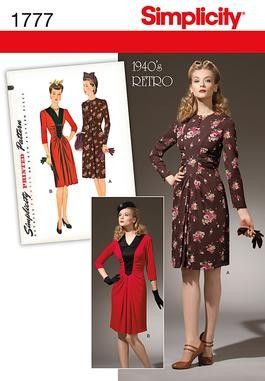
New years dress - Simplicity 1777

My husband and I went to a New Years casino party and I decided I needed a new dress for that occasion. By the way, I always need a new dress for any occasion ;-) hahahaha. What girl doesn't. I didn't have a lot of time to plan and make the dress though as I was all over the place in December. I finally decided on making a dress from a comercial pattern and had simplicity 1777 in my stash for a while. It was time to give this pattern a try.
 
 
I like the look and styling on the pattern envelope, had some crepe back satin to make it, that seemed festive enough and got to work. I cut it out on the 30th of December and sewed it up on New Years eve. I know I am very organised when it comes to my own personal sewing.....not!
 
 
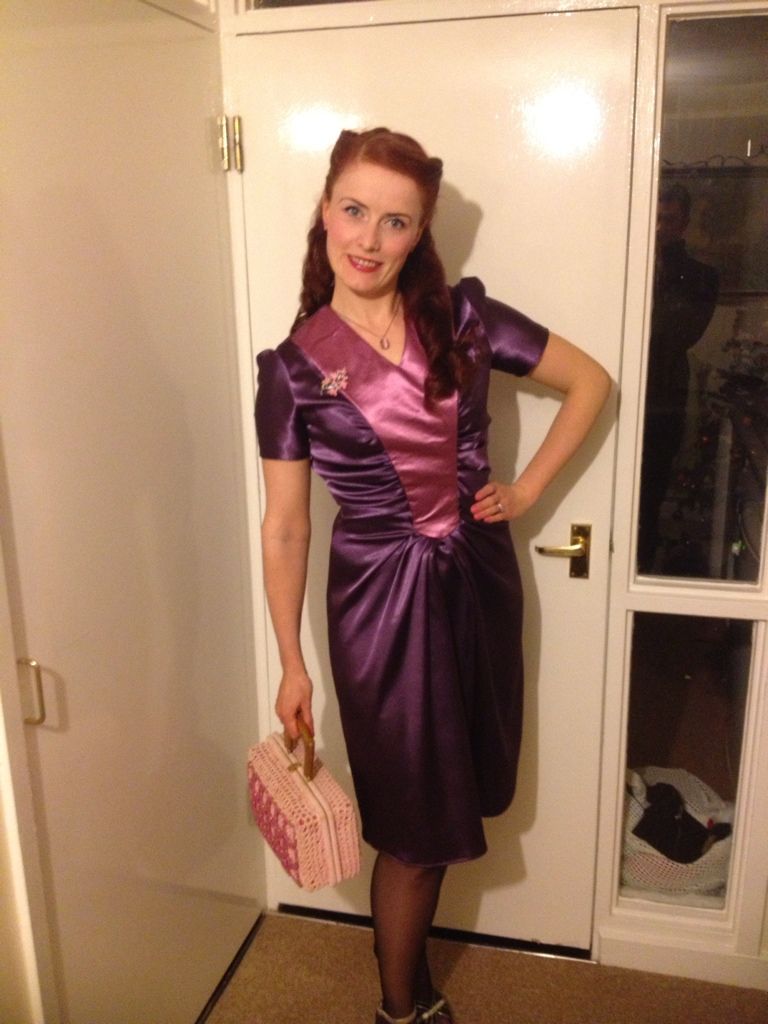
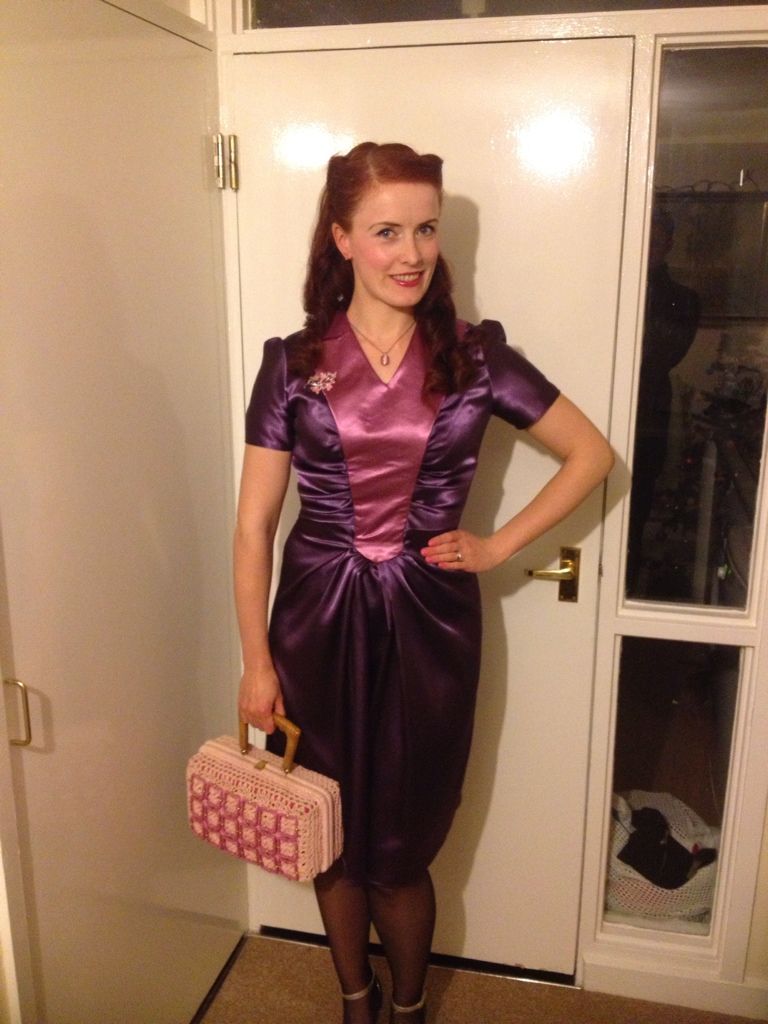
Anyways, I decide on view B with the contrasting panel but made short sleeves instead of long ones as I was running out of fabric.
 
This dress is a relatively quick project to sew. There are only very few pieces but added all together they make quite an eye catching dress, I think. The only tricky bit (I would say) is the gathering around the pointy end of the midsection.

 
Anyways, here is my version. I really like the way it turned out. The short sleeve were great on New Years Eve. It was very warm at the restaurant/pub we went to.


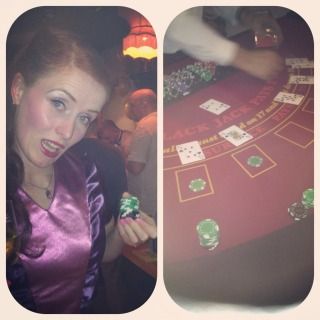
The Casino night was all for Charity and whoever won the most "money" by the end of the night won something ??? I have already forgotten what it was. We came second though which was great.
 
me loving Blackjack...
 
And last but not least, a little silliness from us. As the night went on and we may or may not have had a few drinks, my husband spotted the helium balloons. Next thing, this happened............


PS this is why I shouldn't drink ;-)
 

1/10/2013

New found love for knitting, cute ribbed shrug

As I mentioned in my last post, I have given knitting another chance. I was taught how to knit by my mom and grandmother but haven't really knitted much since I was a kid. I preferred to crochet as I was faster doing that. I attempted to get back into knitting a few years ago and thought a knit along would make me actually finish a project. Well, that didn't go so well and I never finished the bolero I had started.
Fast forward a few years and input tons of inspiration by some awesome knitters in the blogosphere, such as Solanah, Lladybird, by Gum by Golly, Casey and lots of other lovely ladies (please leave me your blog, instagram, ravelry, twitter, facebook etc. if you are a crazy knitting lady so I can follow you for ideas and inspiration and annoy you with lots of questions when I get stuck) and I am hooked.
This time for real. I have actually made a few pieces already, followed patterns and ended up with finished pieces of clothing and accessories ready to share.

On to my third wearable piece of clothing I have finished so far. (the other two are still waiting to be blocked)
This little shrug/bolero is made from a pattern in the book "Fitted knits" by Stefanie Japel. It's available on Amazon here or if you are in the UK, have a look in 'The works'. I got my copy there for £3.99 I believe. Bargain as I like a lot of the patterns in this book.
 
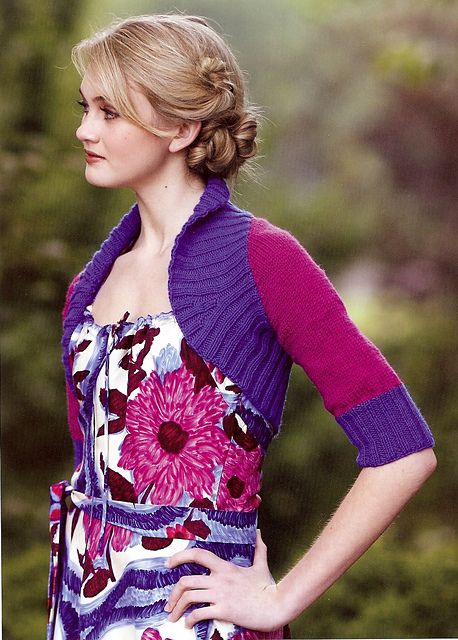
This is the shrug pictured in the book:
 
 
I am not too keen on their colour combo but I like the simplicity of the bolero. It's a great beginners project as you only need to know how to knit and purl. The increases are easy, too. The whole piece is knitted all in one so there is no matching up individually knitted pieces. Just two underarm seams.
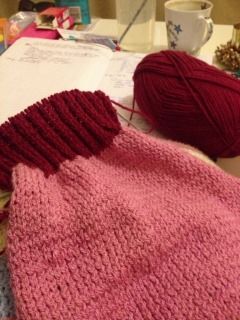
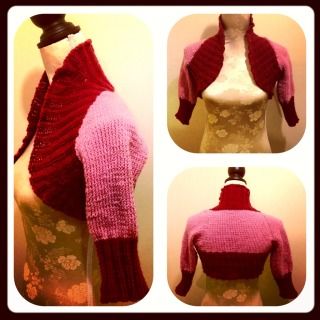
I decided to go for a dusky pink and burgundy colour combination as this will go with a lot of my floral print dresses in the Spring and Summer.
 
 
finished shrug:
 
 
I knitted this mostly in the car on our short road trip to Devon last week. It's a great travel project as it is quick, only needs 2 balls of wool and you can put it down and pick it up again easily as there is no difficult pattern involved.
 
I'm currently making a light brown and chocolate version and maybe an all black one after that.
What are you knitting/crochet-ing at the moment?

1/09/2013

Happy 2013!!

Hi everyone. I hope it is not too late to wish you all a very happy new year. May it bring you everything you wish for and more.
 
Now with the holidays over everyone is ready for the new year, full of new hopes dreams and most importantly goals. Only realistic goals ensure those hopes and dreams become reality. I hope you have already set yours. I have and I'm sure I will add to the list as the year goes on.
 
2012: We moved from Colchester to Reading (Arborfield to be precise), I got to meet some lovely ladies and make their wedding dresses, bridesmaids dresses, party dresses and other pretty frocks. My husband and I refurbished a house to be a student let investment property, we went on trips to Bristol and Bath, the Isle of Wight, Newcastle, Paderborn, the Lake District, Hamburg. We also ran a lot of miles , I learnt how to swim properly and I picked up knitting once again. I don't think I blogged much about the last two points as they happened rather late in the year when blogging was rare. (I was in Germany visiting family and friends before Christmas)
 
Of course 2012 wasn't all happy smiles all of the time but looking at the ups, the downs aren't too bad really. The only thing I really missed this year were our friends back in Colchester as we didn't get to see them as much as we would have liked. All in all we really can't complain. If 2013 brings more of the same I'm happy as a pig in poopy.
 
Now 2013, I do have some goals for you and plans mapped out to achieve them. I will be back on the blog more regularly, sharing sewing and now also knitting projects, shop updates, travel reports and running , swimming and cycling fun. I hope you are interested in all of the above and stick around.
This year I have decided to build up some stock for the shop instead of just 'made to order' pieces, I have a few sewing and knitting projects ready to blog about. We have had our first short break in Devon just after New Years.
 
I am also planing to get out of my comfort zone as far as my sporting endeavours go. I will keep running races (I already have the Brighton Marathon booked in April) but I am ready to branch out into triathlon as soon as my new racing bike gets delivered. I haven't blogged much about it but this has been in the works for a while and is a big deal for me. Now that I have the 'suck big time at swimming issue' solved, all I need it to do is not freak out on my first open water swim (still a huge challenge I have to master) and learn how to use 12747292 gears on a road bike. Betty Schwinn doesn't come with any snazzy features like that.
 
Last but not least, hopefully come Summer time and the next posting for my husband (yes we are moving again.......some things never change) we will be moving back to Germany for a few years. Fingers crossed.
 
So, that's on my plate for this year. For now that's plenty for me. Sorry about the lack of pictures in this blog post, there are lots if you follow all the links and plenty more to come in the next posts.
 
Let me know what your plans and goals for 2013 are. I hope you achieve whatever you set out for. If you blog about it, where can I follow you.
All the best and lots of love!!


11/19/2012

Another race, done and done...........

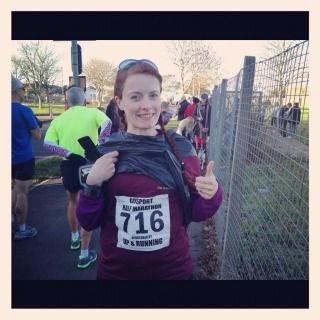
Pre race, sporting the ever so popular bin bag look.
 
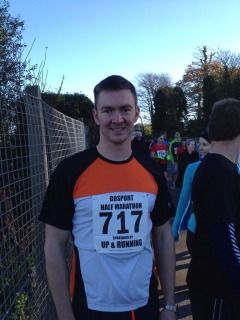
My husband and I ran another race this weekend in Gosport. I booked this half marathon a few weeks back after we ran the last half because I am still chasing my sub 2 hour half marathon time.
It was also the first time I ran all by myself. Usually my husband runs with me to pace me and keep me company. I felt it was time he got to run his own race to see what time he can run it in. He was going for a sub 1:30 and ran an amazing 1:27. I am so proud of him.

 
My super fast husband/running god!!
 
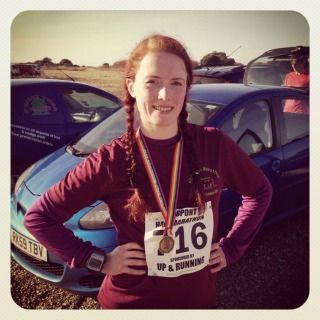
Unfortunately I didn't make my goal of under 2:00 :-( I ran 2:04, close.
I was hoping that a little speed training after running the full marathon would be enough but I guess it takes a little more than that. However I am happy that I can run as fast without my hubby by my side as I run with him pacing me. That was a big thing for me to accomplish. My plan for next year is to start racing in Triathlon. My husband doesn't like swimming so I am all by myself there and I feel confident now, that I can do it. Plus I will obviously keep chasing that sub 2 hour half marathon. It'll happen, watch this space ;-)

 
Post race - Sporting my new medal.
 

11/13/2012

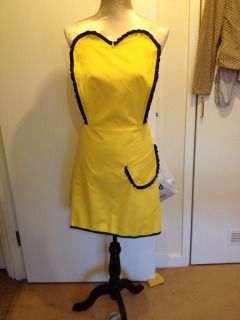
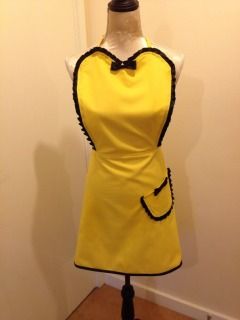
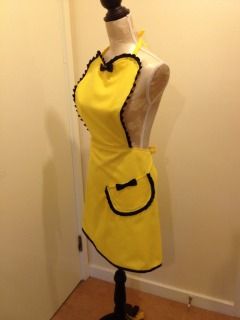
The Judith apron (including tutorial), cute little Christmas gift idea

 
My friend Judith started sewing a little while ago and really got into it. I am always excited when any of my friends pick up sewing as a hobby as I love to see what ideas other people come up with and the things they create.
A couple of weeks back Judith asked me if I could help her figure out how to recreate an apron she had seen, for her friend. She would like to make it as a Christmas present for her and didn't know where to start. I thought that was a very sweet idea and I liked the look of said apron myself which led me to making myself one, taking a few pictures along the way for Judith.
Since Christmas is sort of around the corner for anyone planing to make any presents by hand, I thought I'd share her "tutorial" here. I hope this is helping a few of you readers who are still thinking about what to make for Christmas. It's a good beginners project.
 
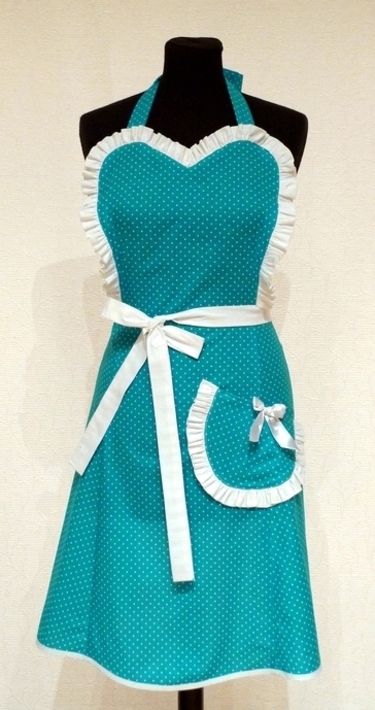
This is the picture of the apron Judith wanted to recreate. 
 
I used this opportunity for some fabric stash busting and went for a yellow and black colour combination.
 
my version. I hope you can read the measurements. Please adjust where necessary.


I am not very good with fancy computer stuff, so I hope a picture of what pieces to cut helps. I think the original apron is cut as one piece or a middle piece and two side pieces but this layout was the most economical for my fabric scraps and the end result looks the same.
The measurements I used
Top:
 12.5" long at center fold
5"wide at waist (for a total of 10")
6.5" wide at the top
I drew the sweetheart free hand

Skirt:
12.5" wide at waist
18" wide at hem
19"long

I drew the pocket free hand, the size I wanted it to be
 
 
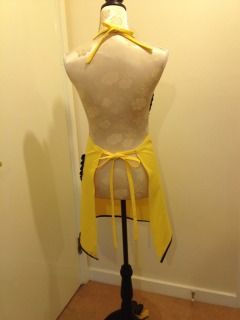
I cut the top on the fold, as well as the "skirt" piece. Not pictured in the pattern are the straps I made from the same fabric. I cut 5cm wide and 50 cm long rectangles (two for the waist strap and one for the neck strap that I cut in half) for that but you could just use ribbon instead. It's less work and works just as well. I just ran out of ribbon.
 
I used about 1/2m (140cm wide) cotton drill, 2m of 2" satin ribbon (more if you want to use it as  and some black bias tape that I had left. This is a very inexpensive project (depending on the fabric you use).
 
Cut out your pieces.
 
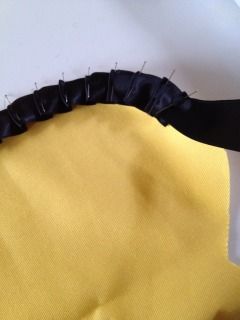
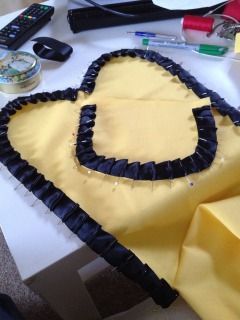
Top with pleated detail: Pin your ribbon onto the top piece around the sides and sweetheart neckline. The right side of the fabric is facing up and you pin all the way around the outside. You can buy pre-pleated ribbon for that. My shop didn't have any so I had to pleat it myself.
 
 
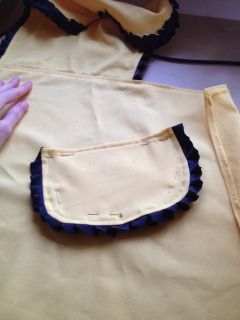
pleat all the way around the pocket, too
 
 
Stitch all the way around about 1cm from the outer edge. I also zig zagged the raw edges (you can do that before pinning the ribbon on, too. I find doing it after sewing on the ribbon reduces the bulk a bit and also secures the ribbon even more.
 
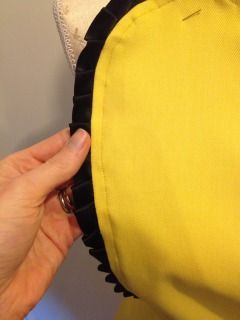
Then fold the ribbon edge around to the back and press. Topstitch all the way around et voila, you have a rushed finish.
 
 
 Now overlock or zig zag the waist line- edge of your top piece and also the upper edge/waistline of your "skirt" piece.
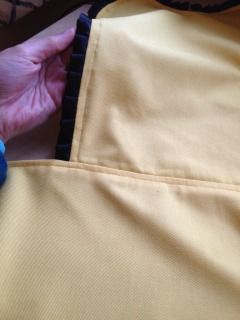
Pin the top piece to the skirt piece along the waistline (center lines matching, right sides of the fabric facing) sew both pieces together and press seam allowance toward the skirt. Top stitch along the waist of the whole "skirt" for a nice finished edge.


Now you are almost done.

Place your pocket where you would like it to be, pin in place and sew. Hem the sides of the "skirt" and the hem. I finished my hem with bias tape in black to pick up the fabric one more time. You can also apply the pleating as on the bodice to add any other trim.


All that's missing now is the ties and a few finishing touches.


I made my own straps. You can either cut strips of fabric the width and length you want plus hem allowance and sew a double folded narrow hem all the way around.

Or you can cut the strips double the width of the strap plus seam allowance, fold then lengthwise (right sides of fabric facing) and sew along the long side and one of the short sides. Turn them inside out, press and ta da, you have a strap.

Attach to the top and skirt and you are done. Add bows and other details if you wish and you have your finished apron.


I am not very good at explaining things, hence I never do tutorials. I am lacking the teacher-patience-gene I guess. Thankfully this is a very straight forward project so I hope it all makes sense, especially to beginners, who have not made any clothing yet.
Please send me a picture or a link to your blog if you are making an apron like this. I'd love to see how they turn out.
 

11/05/2012

1930s/1940s inspired outfit: blouse and beret

 
I made this blouse a while ago. I'm very much into separates this season and thought I could do with another pussy bow blouse. I went with a small print cotton in a light brown-ish colour which I think gives the top a very retro look.
 
 
I also made the trousers but I am not 100% happy with them yet so no details until I have perfected them to my liking. The beret is made from scraps I had left from making the trousers.
I am totally into berets this Autumn/Winter, so I think I need one in almost any colour.


I am so in love with Autumn colours everywhere. I hope they stay a bit before we have to live with naked trees for months :-(

11/01/2012

Is it Christmas yet?

 
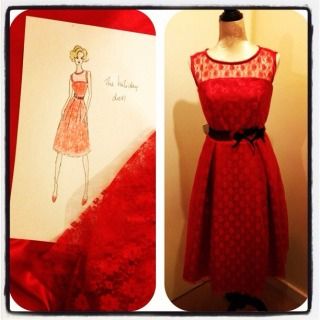
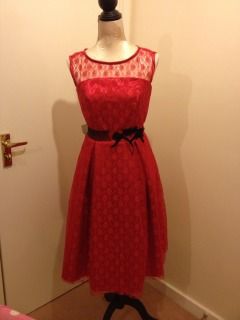
Since Christmas stuff is available in the shops everywhere already (and annoyingly has been for months) I decided to jump onto the waggon and make a dress suitable for upcoming holiday parties. It's the colour that makes it suitable for those occasions otherwise it's just a cute little red party dress. Whatever the occasion, I am in love with it.
 

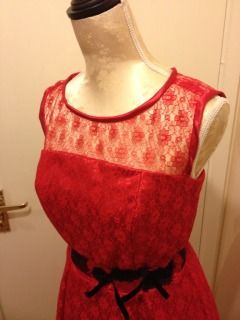
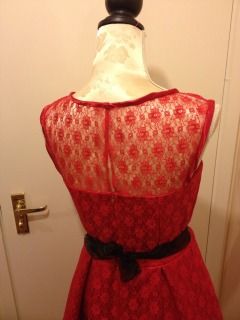
I used a simple strapless bodice pattern and drafted the shoulder/back yoke. The skirt is a slight a line shape pleated at the bodice front seams and back seams for detail.

 
I also added a belt which is an organza ribbon with lace flowers cut out from the scraps. I also had a few scraps of the same lace in black from a dress I made for a customer earlier this year and two black velvet ribbon bows.


I also made some self fabric bias tape from the satin underneath the lace to go around the lace yoke. he dress is also fully lined.


Hopefully I will get some action shots soon.