Showing posts with label inspiration. Show all posts

6/15/2013

Want to learn a new skill like how to do vintage hair? Check out The Amazings.......

A few weeks ago I was contacted by The Amazings, an organisation where retiring or retired people pass on their skills and knowledge in workshops and classes and currently offer about 200 real life courses.

Because their classes have been so successful, The Amazings are now branching out into online classes everyone can take part in, in their own time, revisit and retake as often as they like.
I was asked if I was interested in checking out their website and trying a class currently available. Since I am always interested in learning new things, I jumped at the chance. 

There are currently 8 online classes available with more being added every week. There is no charge to join the site but the classes themselves range in price from £8 to £20.

I decided to try out the retro hair do class as this is a subject I am always experimenting with and want to learn more about. The retro hair do course is £12 and for that you receive 
video tutorials for three vintage hairstyles with a modern twist. They are not authentic vintage but rather vintage inspired. A very charming and wonderful teacher Michael, who is a hairdresser and knows his craft, explains step by step how to recreate each style and provides tips and tricks alongside the videos like little "hand-me-outs" You can also communicate with fellow classmates and Michael, in case you feel like you need more information and help.


Michael is very sweet and seems to love his profession as a hair stylist. You can tell he is very enthusiastic and very knowledgeable about what he is doing. I recommend watching all three videos first before getting started on your own hair. The setting of the hair is very similar for all three styles and is shown in each individual video. Michael explains a few extra bits in each video which will be useful, especially for people new to vintage hair styling. If you only watch one video at a time, trying to recreate a style you might miss a few bits of information for a successful finish. What I like is that Michael gives a few tips on what products to use and how. I also liked his little stories very much. 

Now, how did I do?
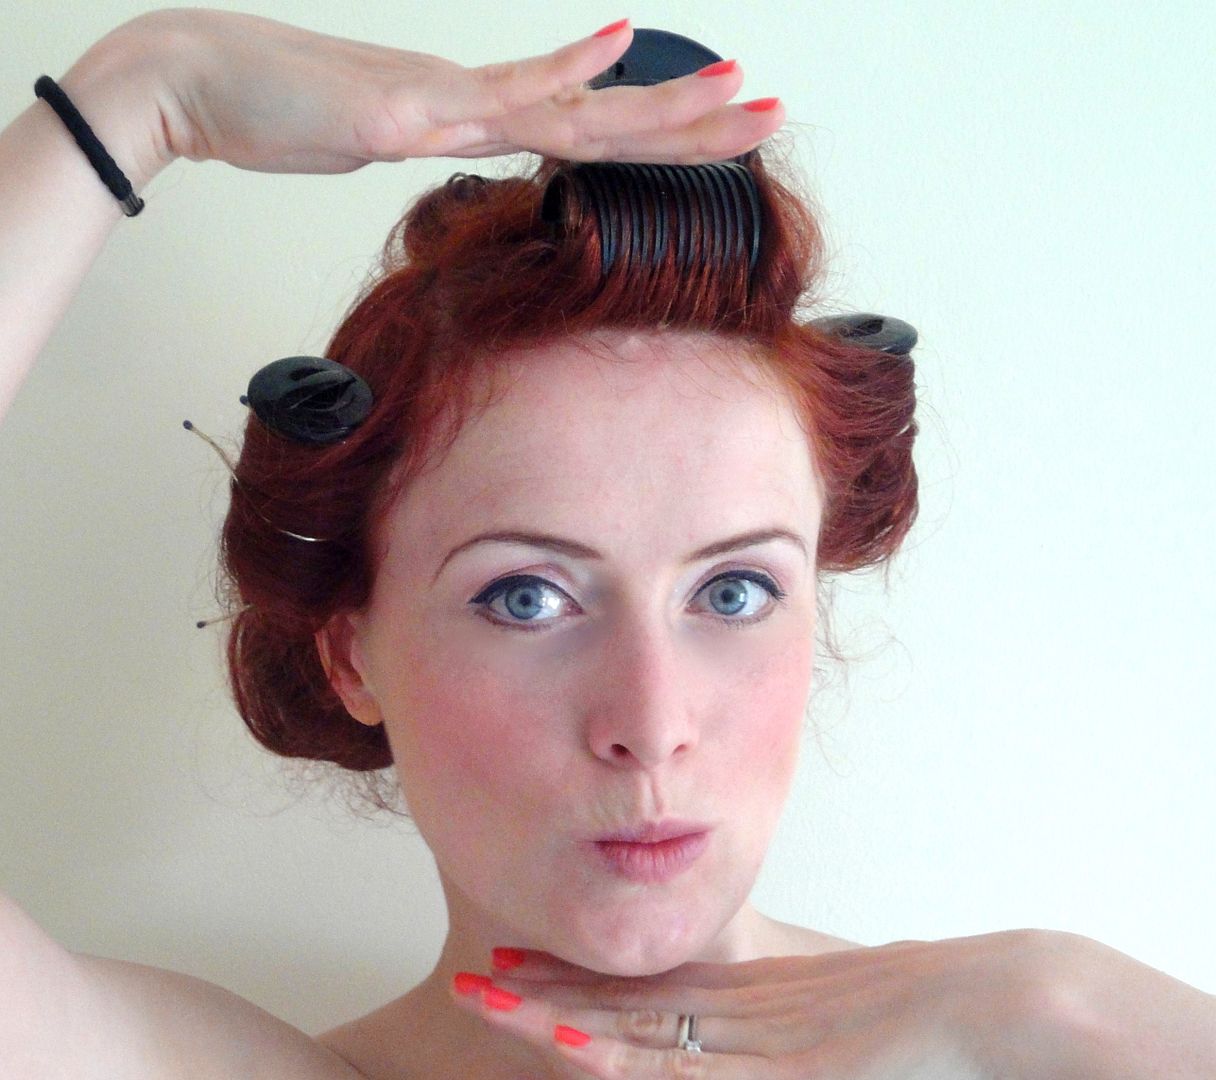
setting my hair, it pretty much looked the same for all three styles

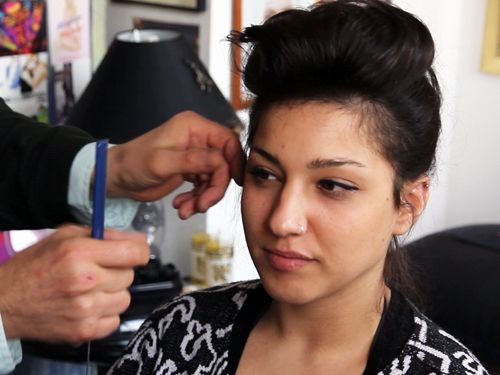
I decided to have a go at all three hairstyles to see if you really can recreate them all by yourself with the help of this course. You will need a set of hot rollers for all three hair dos. Michael explains and shows how to roll and set your hair.
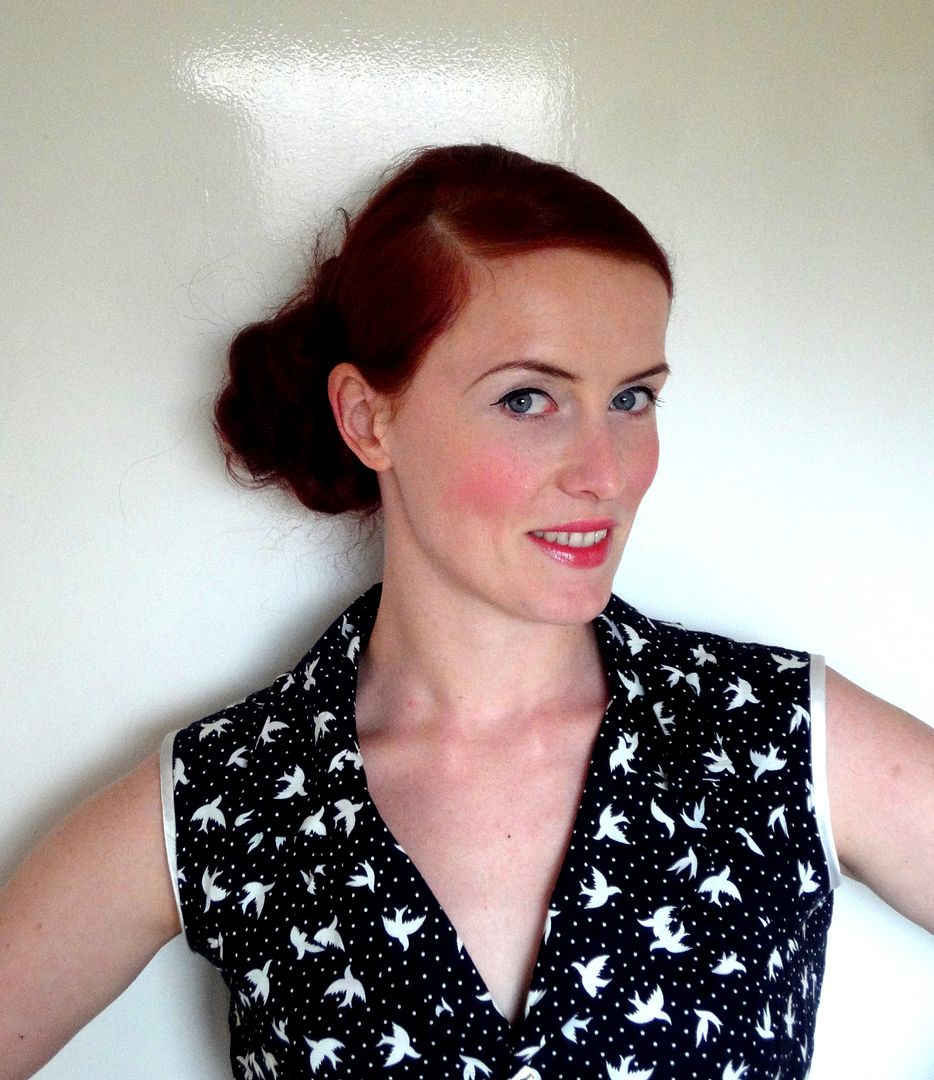

The first style is a 1930s inspired chignon to one side of the head. I really liked that style on the model and hers is a hair do I have not previously tried. (sorry I don't have a picture of her) 

Style number two, rockabilly.
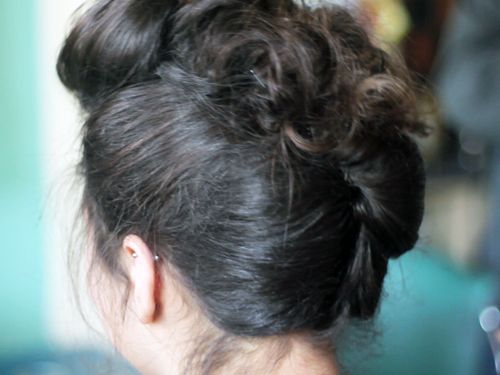
The Amazings version (pictures The Amazings)
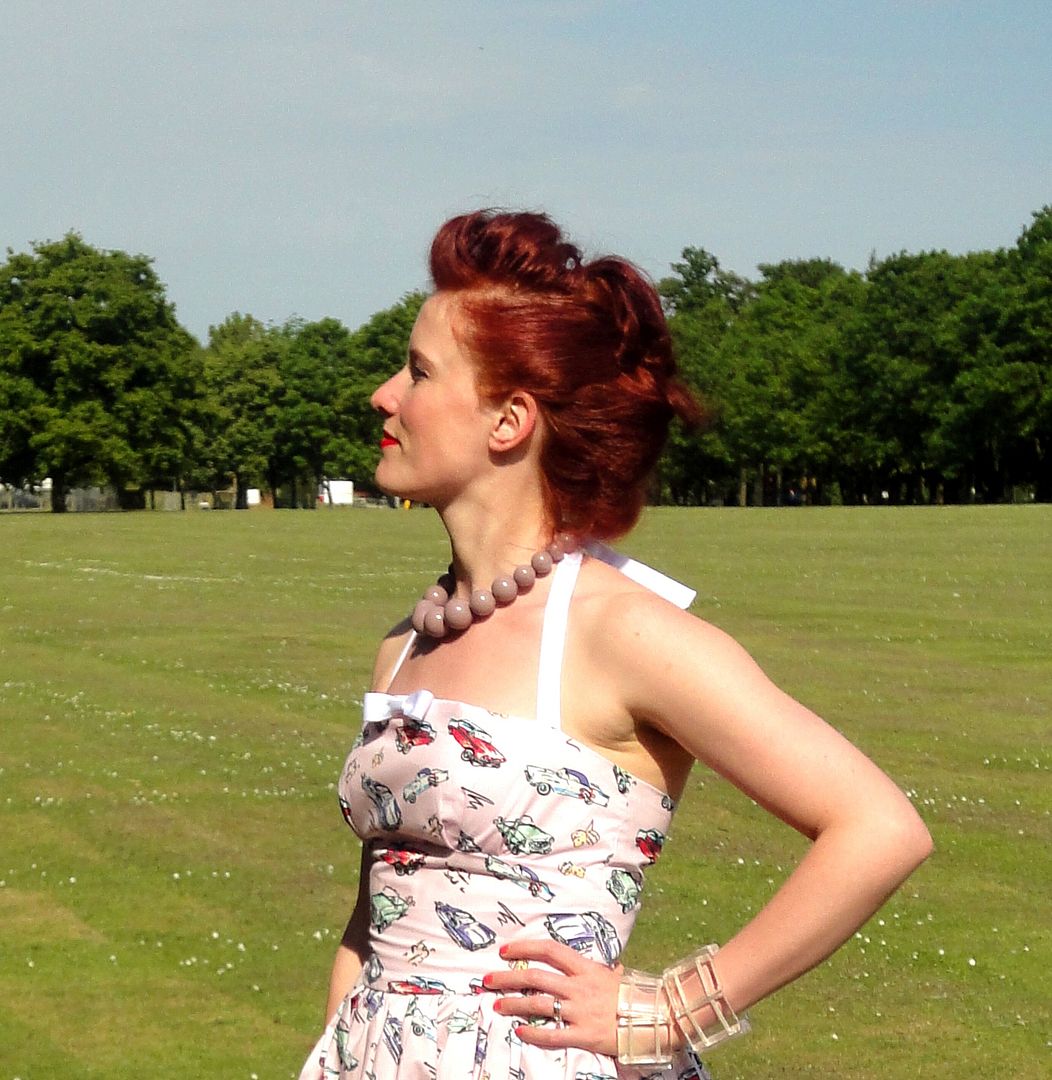
my version
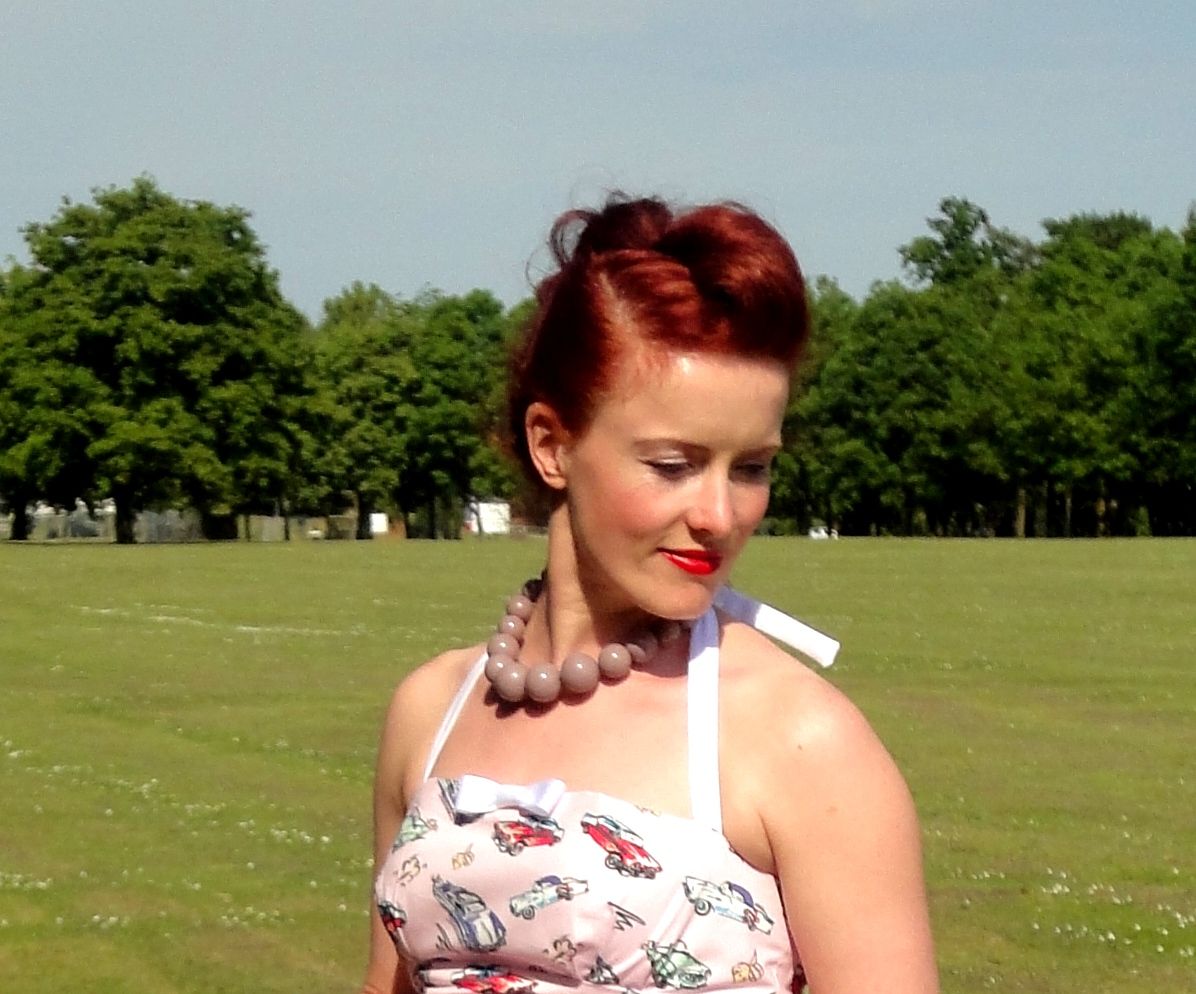

The rockabilly inspired style. I'm not 100% into this do. It's a more messy take on the quiff and I prefer more sleek looks for myself. It did however turn out pretty much like the hair style on the model.

The third style is a 1960s Bridget Bardot inspired beehive. I love this style but I'm not sure it suits me that well. I haven't got layered hair so I had to tuck the front of my hair to the sides.
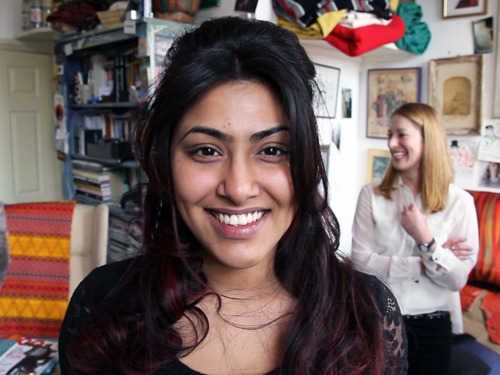
The Amazings model, isn't she gorgeous? source
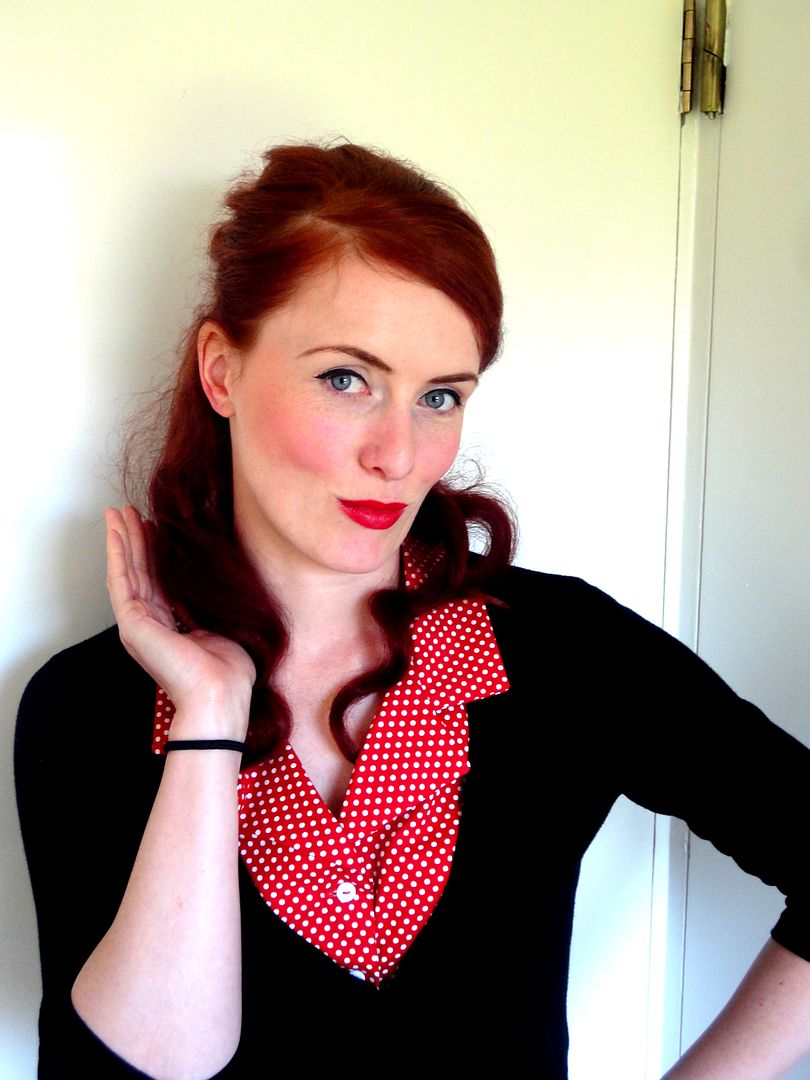
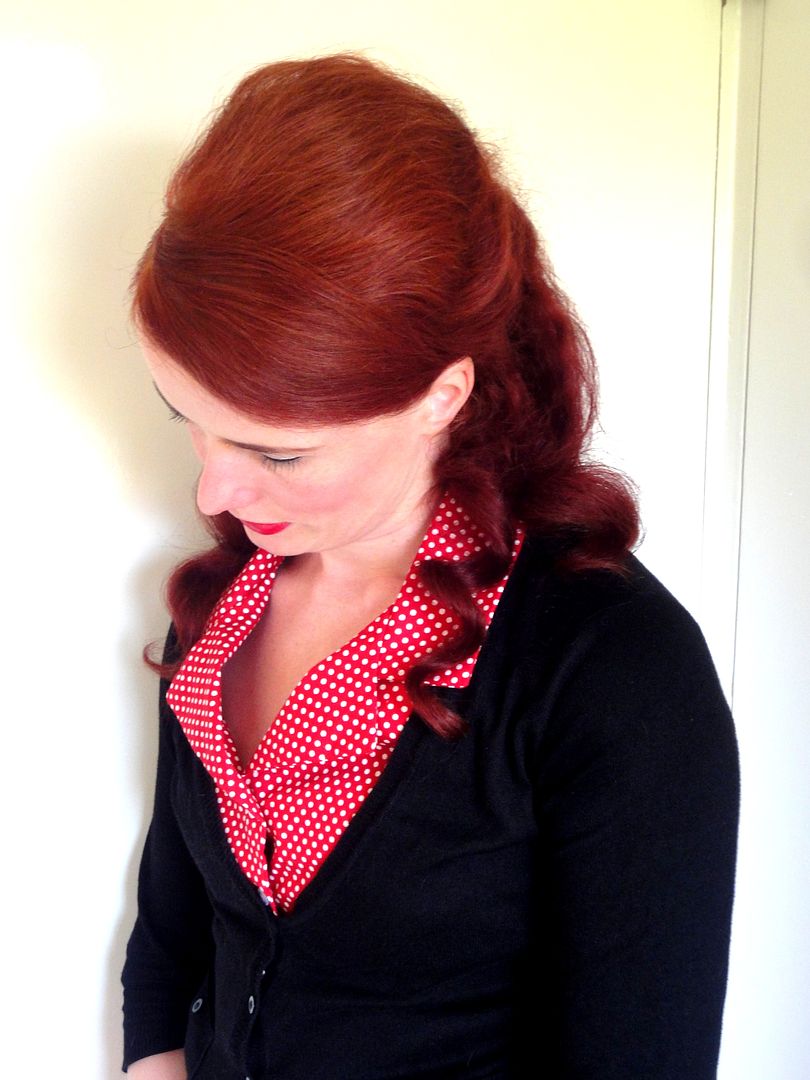
and this is my version


My verdict: I really like the idea of The Amazings. I would like to try a real life class in the future and see what they are like. The online class format reminds me a bit of the Craftsy courses. I have never taken a craftsy class so I wont know if they actually are similar or not but the concept seems to be. If The Amazings keep doing what they are doing and add to their repertoire, I can't see why they won't become as popular. 

As far as the online class goes, I think it is a great class for people who want to try out some retro hair dos. The ways they are styled are very much geared at all girls and women who like a bit of a hair do that stands out from the mass, not necessarily just for vintage and retro enthusiasts.  The video tutorials are easy to follow and guide you to a satisfying result. Beginners might have to have a few goes at using the hot rollers and maybe each hairstyle won't be perfect straight away. But with time and practise, they will get there in no time. I like that you will learn techniques, little tips and tricks on how to do it by yourself (not with a wonderful hair stylist, styling your hair for you) and what products to use.

I would have liked to see an alternative to hot rollers for those people who don't own a set and don't want to buy one just to have a go. But maybe Michael will have an alternative if you contact him via the website for help. I didn't use the interactive possibilities. I also hope the prices will go down with increasing interest. I don't think £12 is too much for a class like that at all but with countless free tutorials on youtube and vimeo etc. there is a lot of competition.

Now go and check out The Amazings for yourself, try out a class and see what you think. There is anything from knitting to sewing to diy cosmetics etc.

Disclaimer: I got to try the online class for free however all opinions are my own.

5/14/2013

Style and sewing inspiration Lemon Breeland

I never know if everyone is past a new (or better: new to me) TV show already or if there just isn't a lot of hype around it... I don't own a TV so I'm usually behind on everything that's new. If it's not on Iplayer or the other channel's equivalent I usually don't know about it unless I find out about a new show via the blogging community. Anyways I have recently gotten into watching "Hart of Dixie" an American TV show that's been running for two seasons already starring Rachel Bilson. I kinda like Rachel Bilson so I thought I'd check it out and get the DVDs on Lovefilm. When my husband asked me after a few episodes what it was about, I described it as a modern day Dr. Quinn Medicine Woman. I think that is a pretty much the whole show in a nutshell. Young Doctor from New York City moves to Bluebell, Alabama to spend some time in a practise as a GP before moving on in her career as a surgeon.
Upon arrival the local people dislikes her immediately and she's struggling to fit in. With every episode and every challenge conquered she wins over the community bit by bit. There are also some possible love interests build in, one she can't have and one she doesn't want.... the usual. It's very easy entertainment and great to watch while doing something else e.g. sewing, knitting.... on the side.
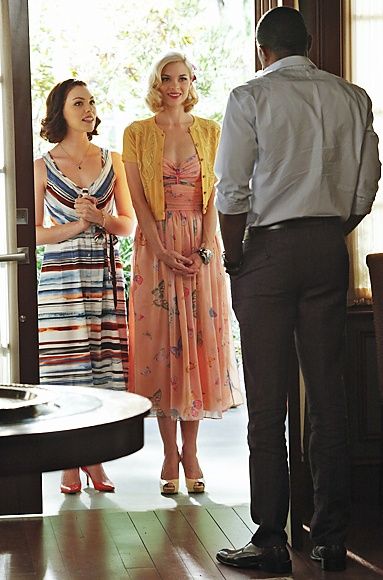
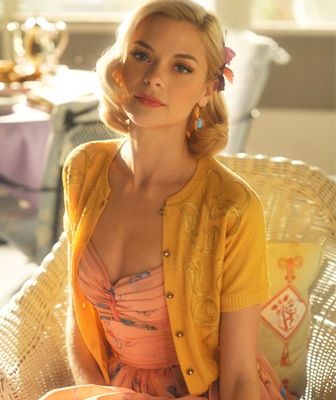
Now the main reason I kept watching the show is because it has kind of a Pushing Daisies vibe to me. Some OTT characters, the kind of look/mood of the way it's filmed (I hope I'm making sense here) and the costumes of the women in Bluebell.
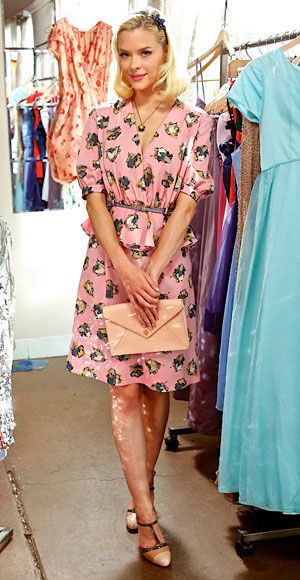
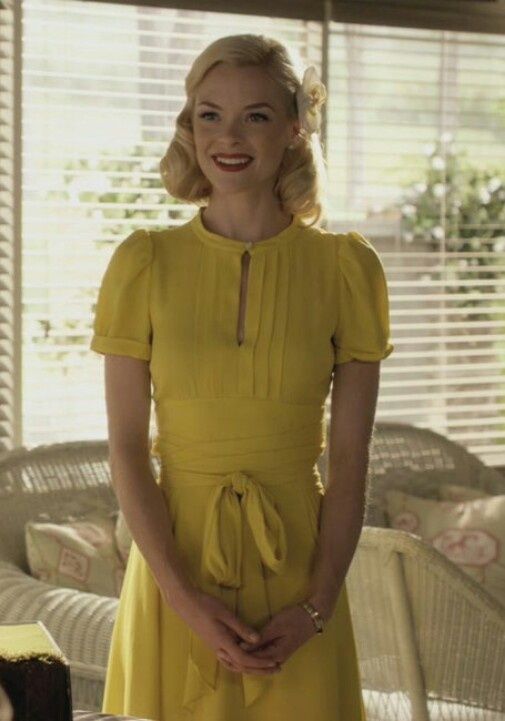
My favourite character Lemon Breeland is played by Jamie King. She s basically Betty Draper with a Bree Vandercamp personality. Her costumes are very 1950s housewife-ish and she is the perfect little homemaker with a hidden agenda of course. Gotta keep things interesting, right?
If you haven't already seen the show, go check it out. I recommend it more for costumes and the beautiful setting than the story line.


source 1 and 2
 
 
Anyone else watching the show? What do you think?


4/09/2013

Some rainy day entertainment for you: Vintage Karl Lagerfeld, Diane von Fuerstenberg, Betsey Johnson and John Weitz

I stumbled over this video a couple of days ago when researching Karl Lagerfeld a little. I'm a huge fan of almost anything he does and find him very inspiring as a person. I hope I will still be as interested in everything around me and creative when I'm his age. I thought you might enjoy this video of a young Karl and of course young Diane von Fuerstenberg and Betsey Johnson, who by the way nailed one of the big trends of the 1980s here. Ithink the Video is from 1980?? It's so outdated and some of the comments and conversation (especially with the audience) made me cringe but it shoes how far we've come since then. I love watching the models strut their stuff, sooooooo different from today's stork like catwalking. I hope you enjoy this little video.


PS, I would totally wear Diane's dresses today. Shows how classic and timeless her style is.

2/21/2013

Sew For Victory! The design and pattern

Its time for an update on my Sew For Victory! project(s).
I have decided to make two dresses because I was so exited and I couldn't decide which one to go for and also I wanted to make (and then have) patterns for both styles.
Number one is a cotton shirt dress. Yes, a shirt dress, because I can not have too many and I just love that kind of dress.
I didn't have a pattern to make the dress so I had to come up with my own.
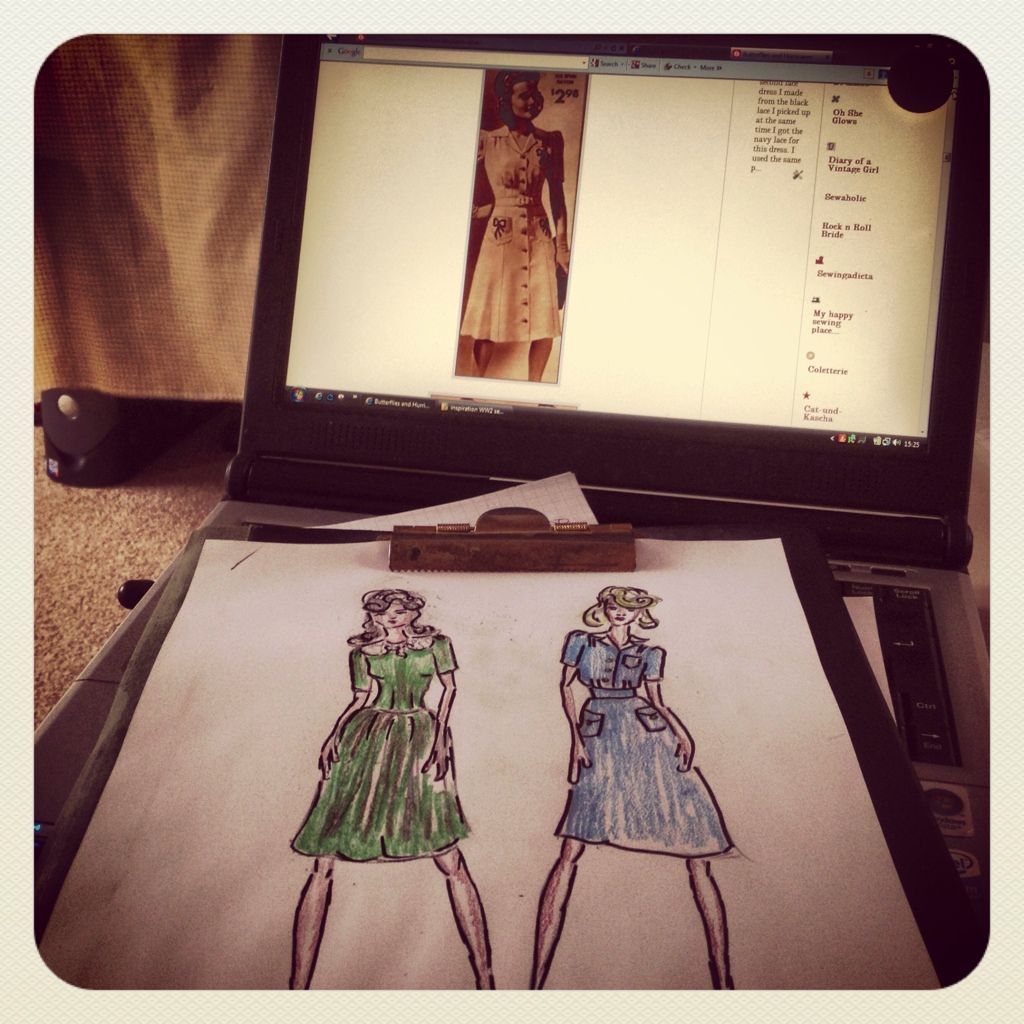
My design was inspired by elements from my inspiration dresses in this post here.

Ignore the dress on the left, that was just another idea I wont be working on for now.
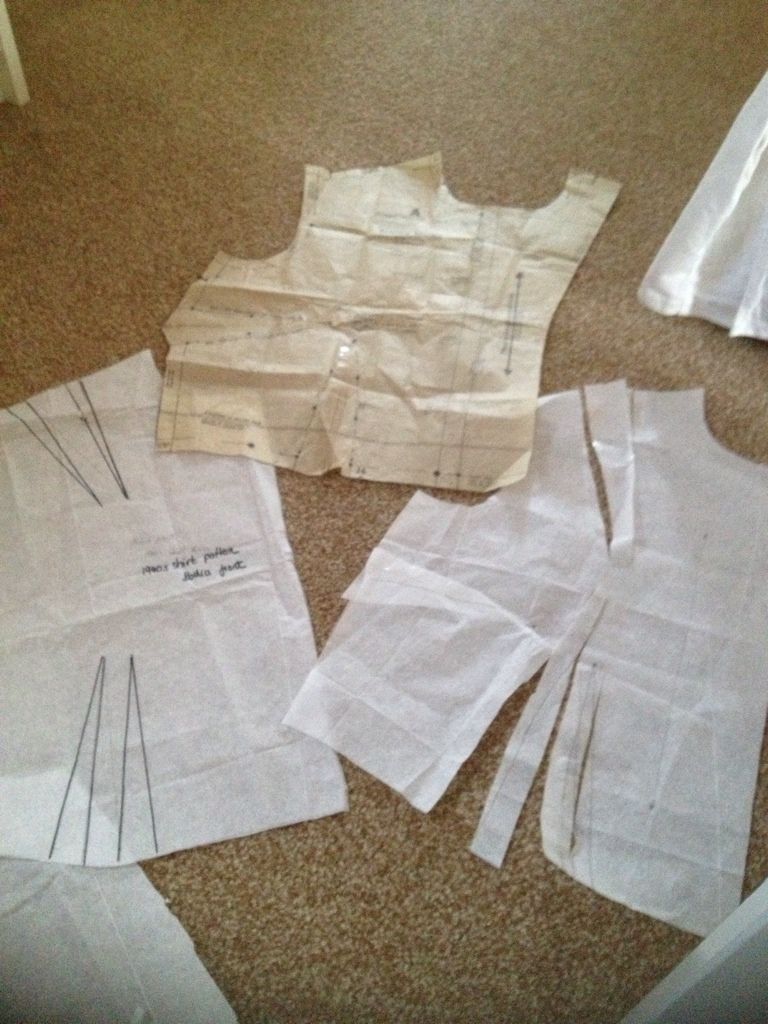
I used an existing pattern I have and moved the darts to where I wanted them to be in the pattern. The original pattern has a bust dart and a waist dart so I eliminated the bust dart added darts to the shoulder and one more dart to the waist to keep the fit of the original pattern and create the new look that I was after.

So sorry about the blurry picture (original pattern above, traced and manipulated on the right and new pattern piece on the left)


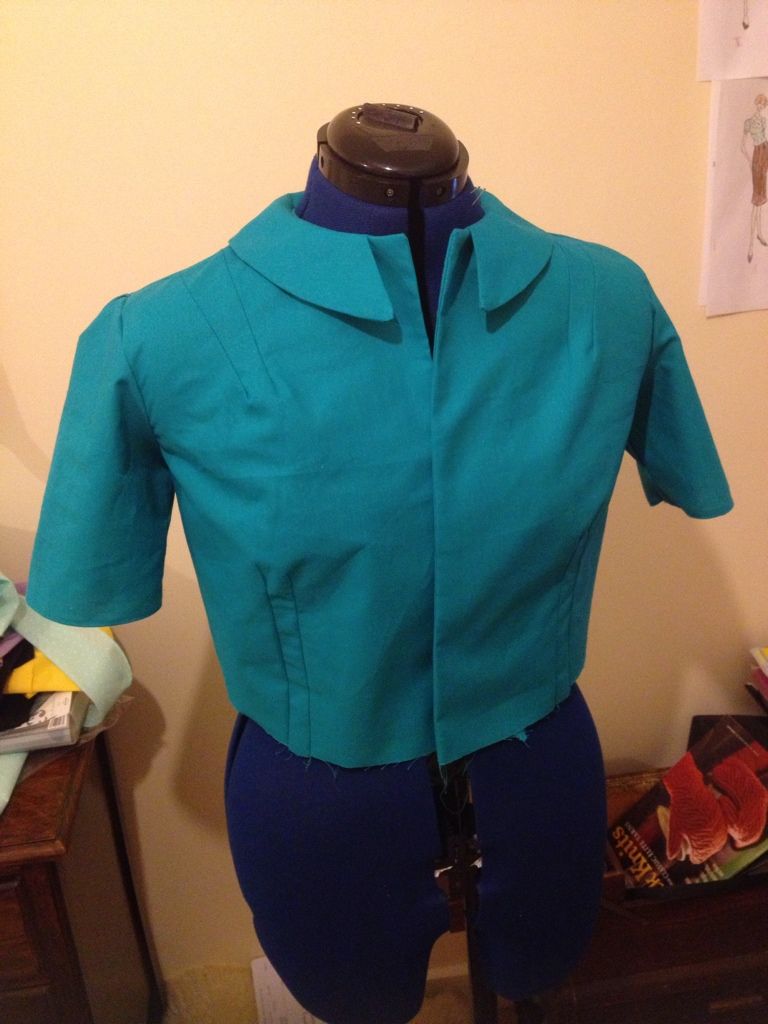
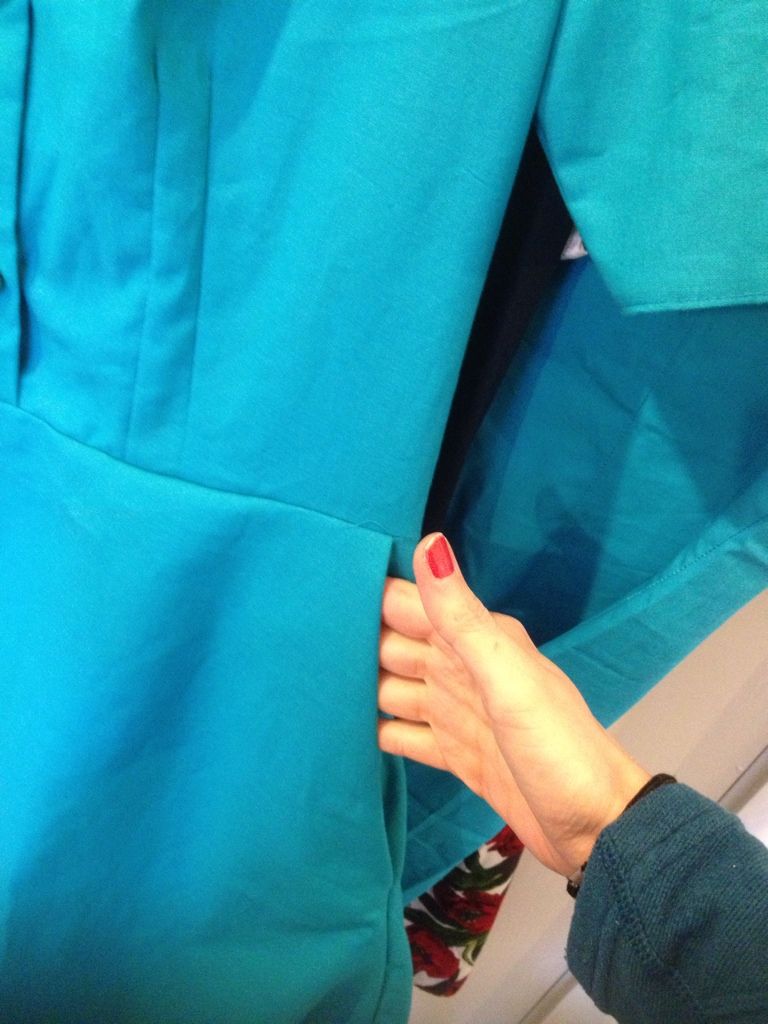
I used a turquoise cotton for this first dress. I don't own a lot of dresses in solid colours so I thought it was about time to make a few.


The collar in the drawing is white but none of my scraps were the right shape and size to squeeze one out. Trying the whole nifty thrifty make do and mend-thing of the war time era, I decided to just make it in the same colour.


And then I had another major fail due to my pattern butchering and over excitement. I cut the front piece of the skirt to small. It wasn't wide enough to match up with the waistline of the bodice. Panic!!!!!!!
And then I thought, before I go and buy more fabric I get that make do and mend - mentality working again and find a solution. The solution was a quick and quite easy one and resulted in another design change from my drawing.


 Pockets!!!!

The day was saved, the dress and my wallet, too.
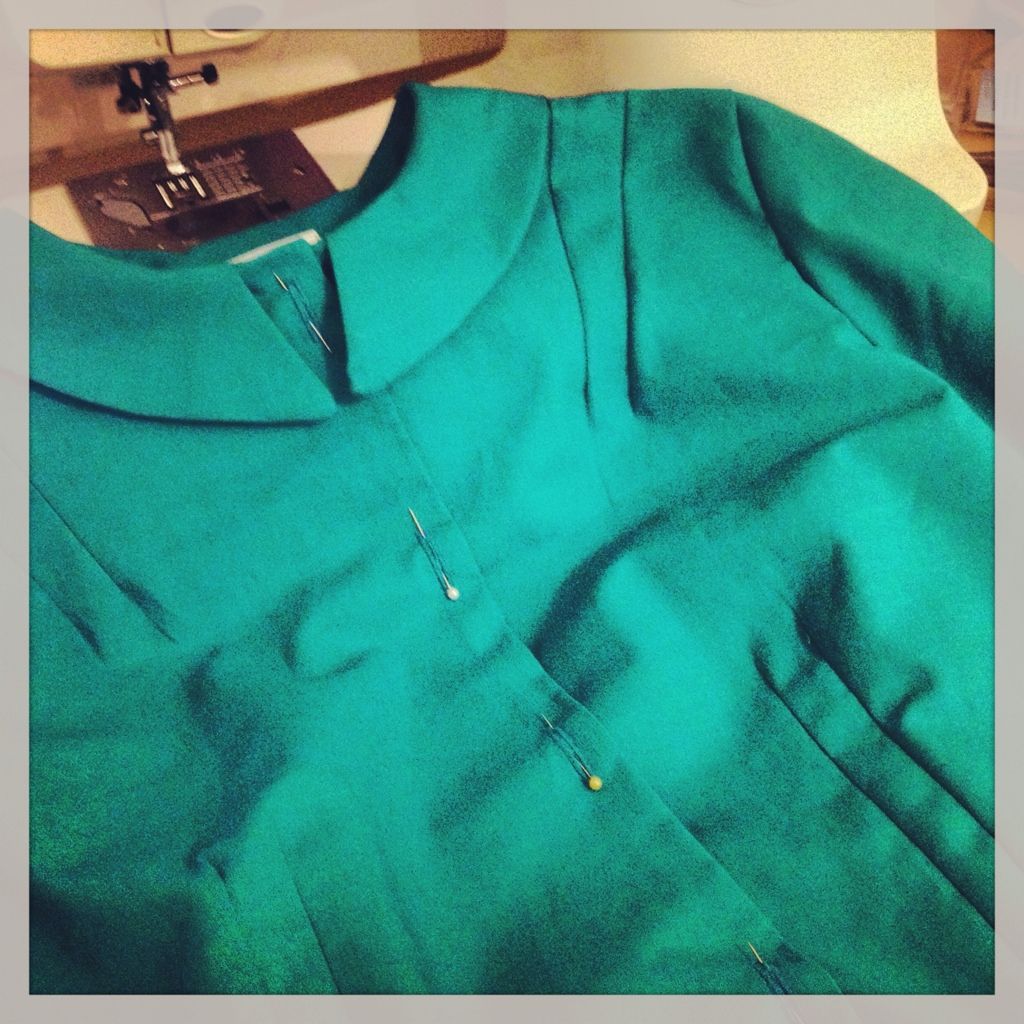
Sorry about the blurry pictures. They were all taken at night while I was working on the dress. I didn't check them on a bigger screen until today. Lesson learnt!

Oh and I'm sure someone will ask about this, the shirt bodice front I used to manipulate is Simplicity 5022, a (I am guessing) 1960s pattern.

How is everyone getting on with their projects?

2/06/2013

Sew for victory! 1940s sewalong and I am in!!!

Rochelle from Lucky Lucille has called the united vintage sewing world to do their bit for the sewing community and their wardrobe and take part in this awesome sewing challenge.

http://luckylucille.com/2013/02/sew-for-victory-a-40s-sewalong/
 
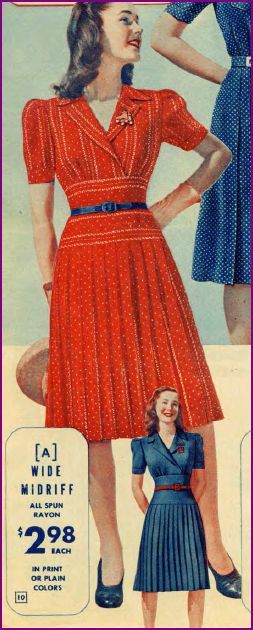
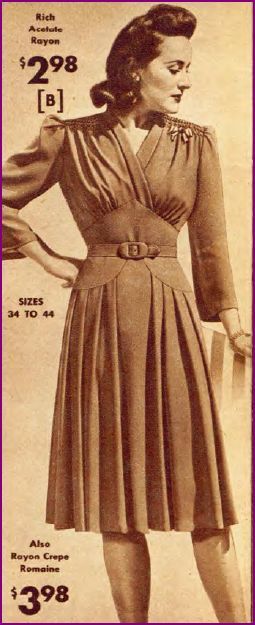
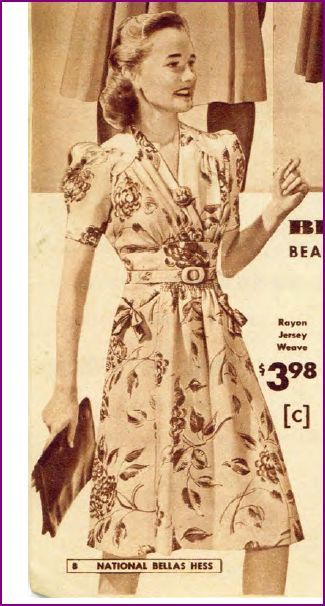
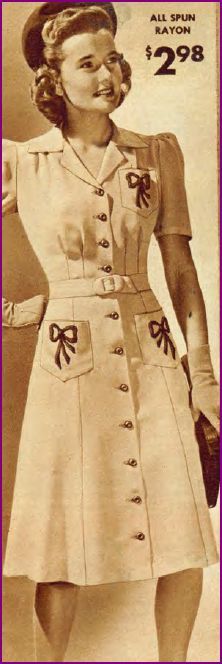
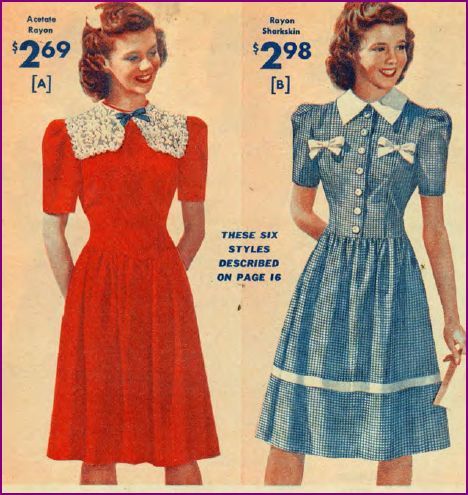
As a dutiful sewing blogger, I decided to take part. Especially after browsing around for inspiration. I love the 1940s fashions. Most dresses have wonderful pleating details, interesting dart shaping and small but effective embellishments that make the pieces pop and best of all they require very little fabric. As much as I like the big full dresses and skirts of the 1950s as well as the lush evening wear of that time, the 1940s really are my favourite era.
I haven't set my mind yet on what I am going to make exactly but it'll probably be a dress of some sort and I will have to draft the pattern myself. I hope it all goes to plan.
I will leave you with some inspiration. I cant wait to see everyone's prioject(s)


All images taken from the 1943 Bella Hess catalogue (Thanks Rochelle for the link!!!)

2/05/2013

Work in progress...knitting and sewing

I haven't got any finished and photographed items to show today but there is quite a few things I am working on at the moment.
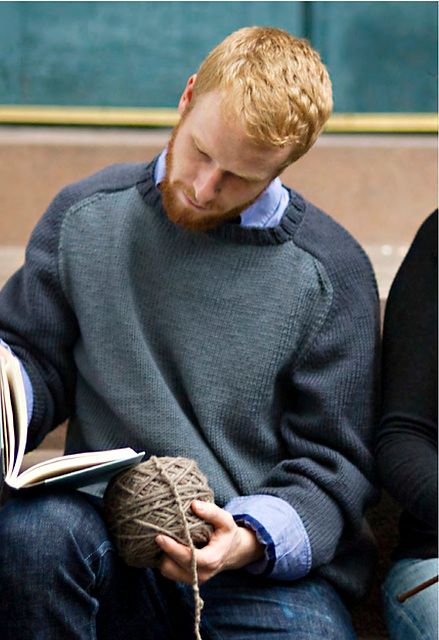
I am working on my first knitting project for my husband. He is a very picky guy when it comes to his clothing and only likes what he likes. He's is not a vintage or retro kinda guy and I'm not very inspired by the thought of sewing for men anyways. Most patterns (vintage or not) for men are kinda blah anyways and knitting patterns are often even worse.
 
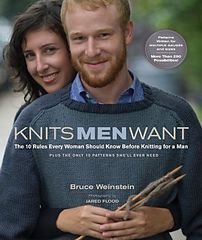
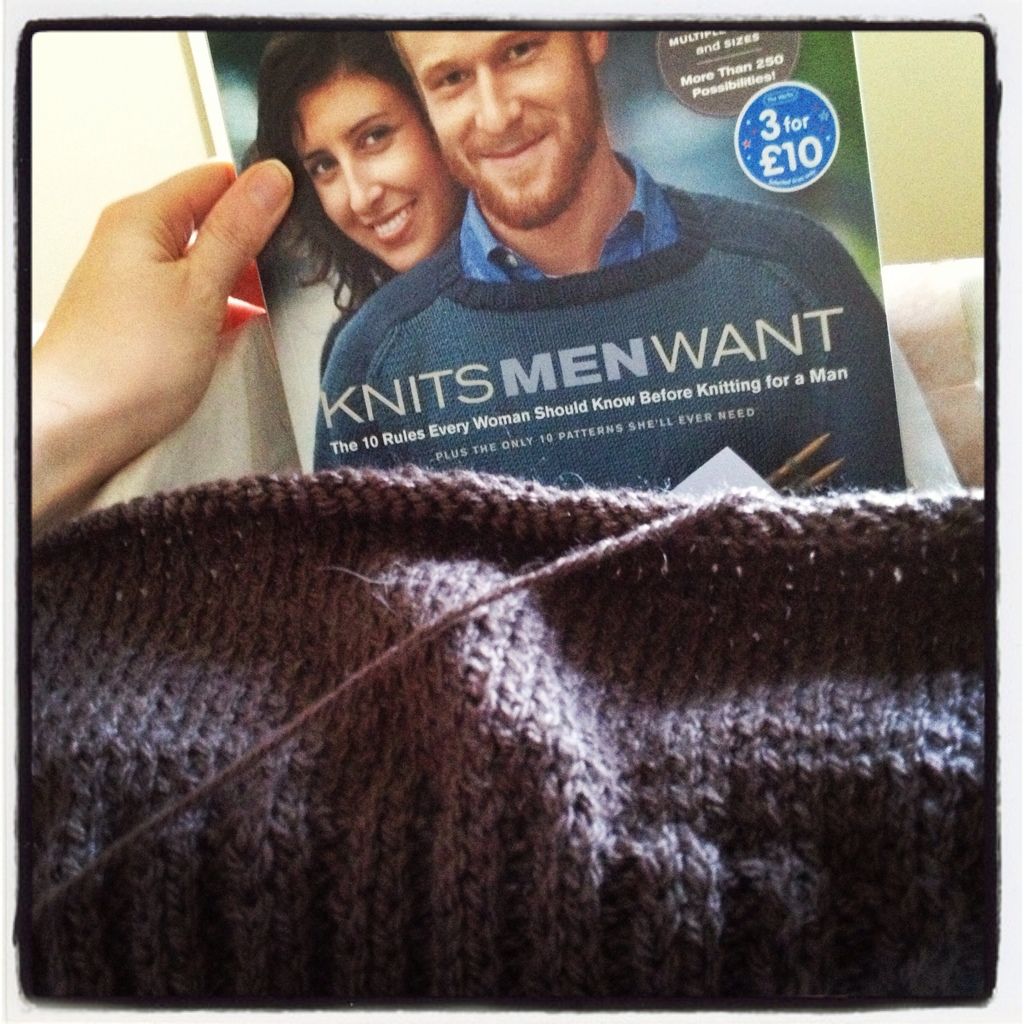
However we did find a knitting book a few weeks ago at The Works (hurray for being cheap, too) which feature a few designs my husband actually really liked.
 
 
So I bought it, we picked a pattern and found wool in acceptable colours (I never thought we'll get it all together) and I got going.

 
So far I have the front and back piece finished and one sleeve started. A few more evenings and it should be finished. I hope it turns out alright and he loves it and will actually wear it. For now, I will leave you with some great versions of the pattern here on revelry.
 
Have any of you got this book and made anything from it? Do you sew or knit for your husband, boyfriend, partner a lot? If you do, can you recommend any patterns you have successfully used? Maybe I can suggest some of those to my hubby.
I have seen a McCalls shirt Suzy has made for her husband which could be a success.
 
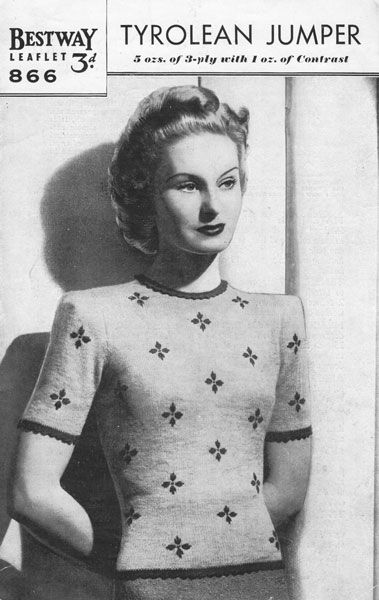
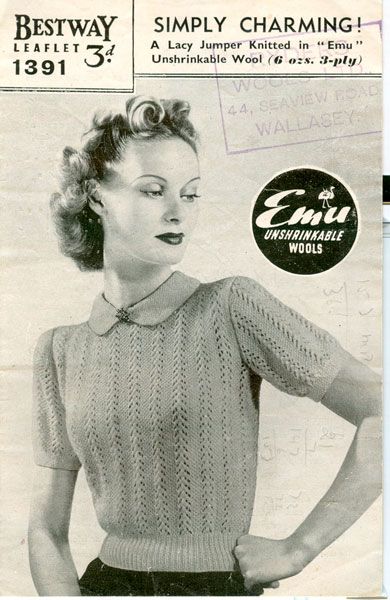
I have also treated myself to some knitting patterns from The Vintage Knitting Lady (as if I haven't bought plenty of knitting books recently) and hope to get my hands one one of them as soon as the mister's jumper is finished.
 
I got Bestway 731
available here if you scroll down a little

Bestway 866
available here if you scroll down a little

 and Bestway 1391
available here if you scroll down a little

I think that will keep me busy for a while!!!!

I am also working on a few new styles for my shop which I shall be sharing with you shortly.

1/28/2013

Mint green and red

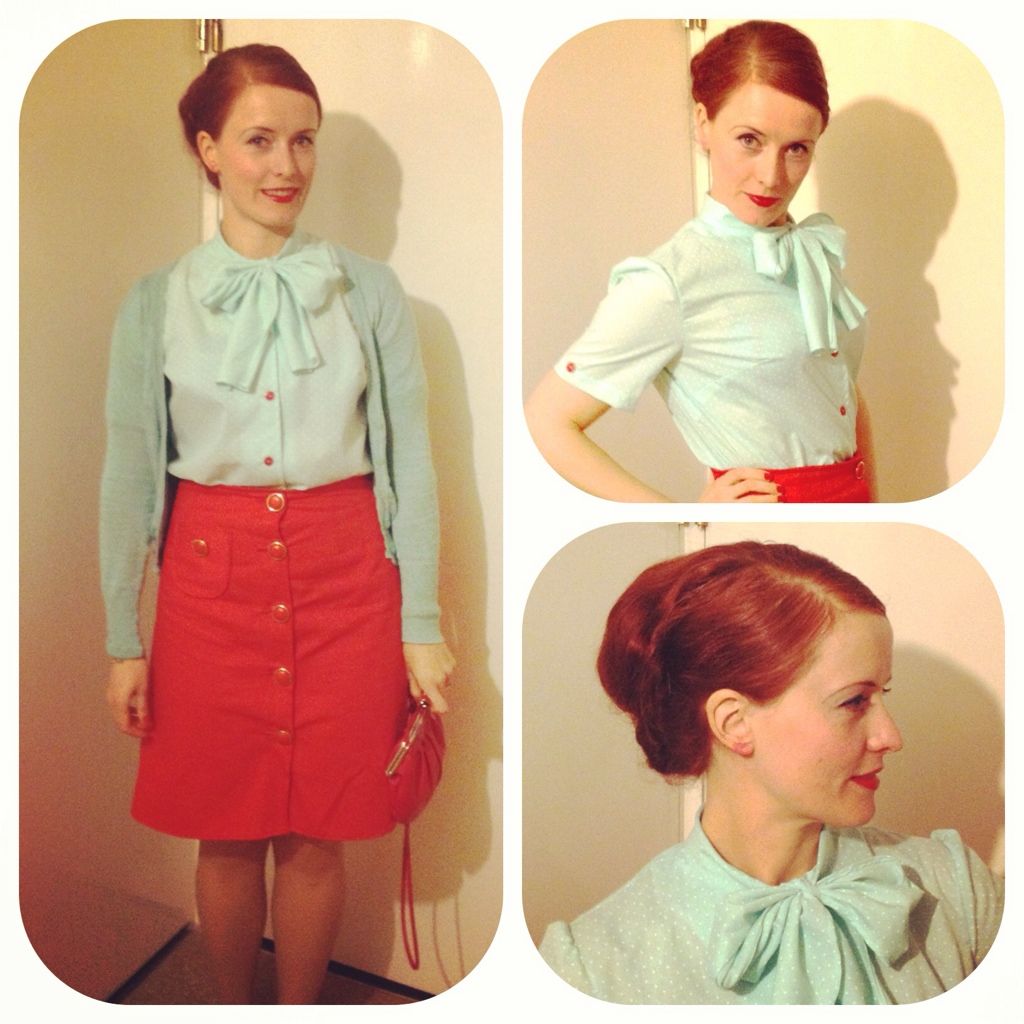
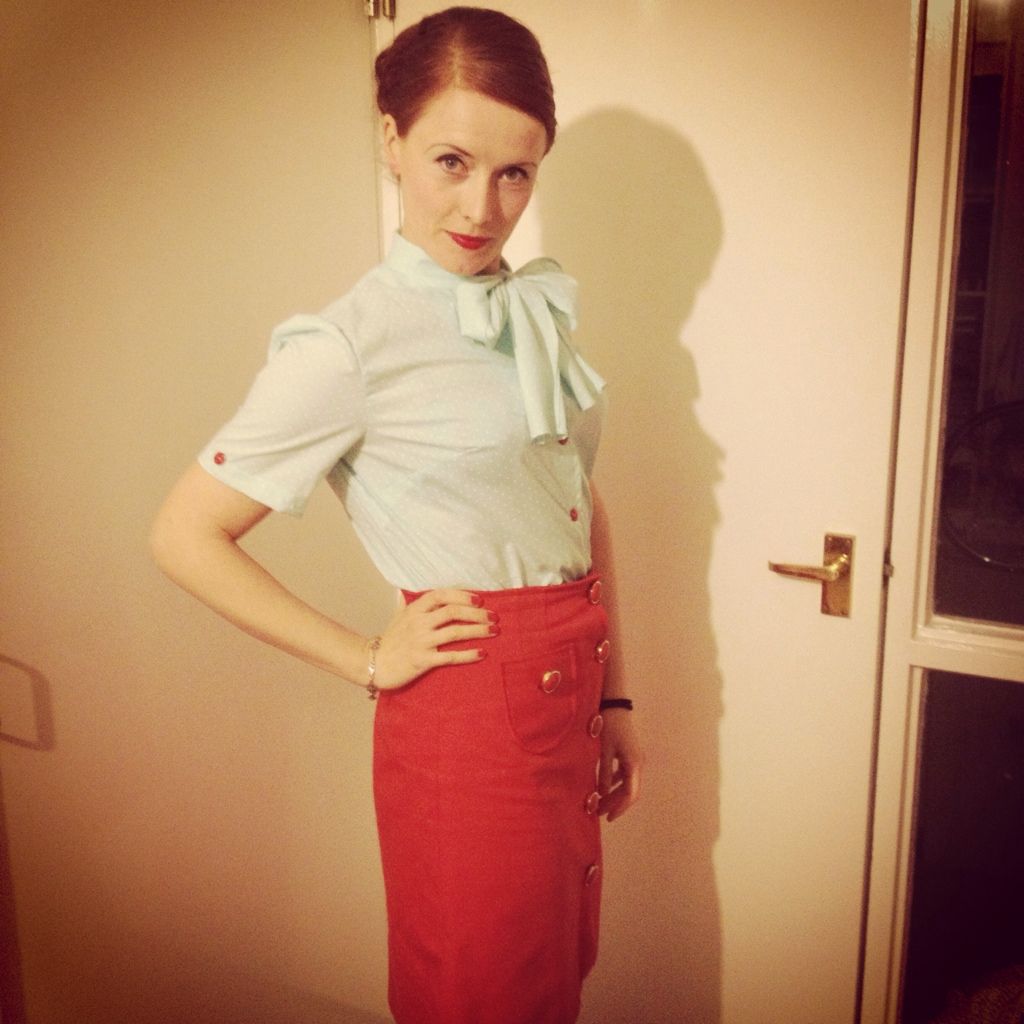
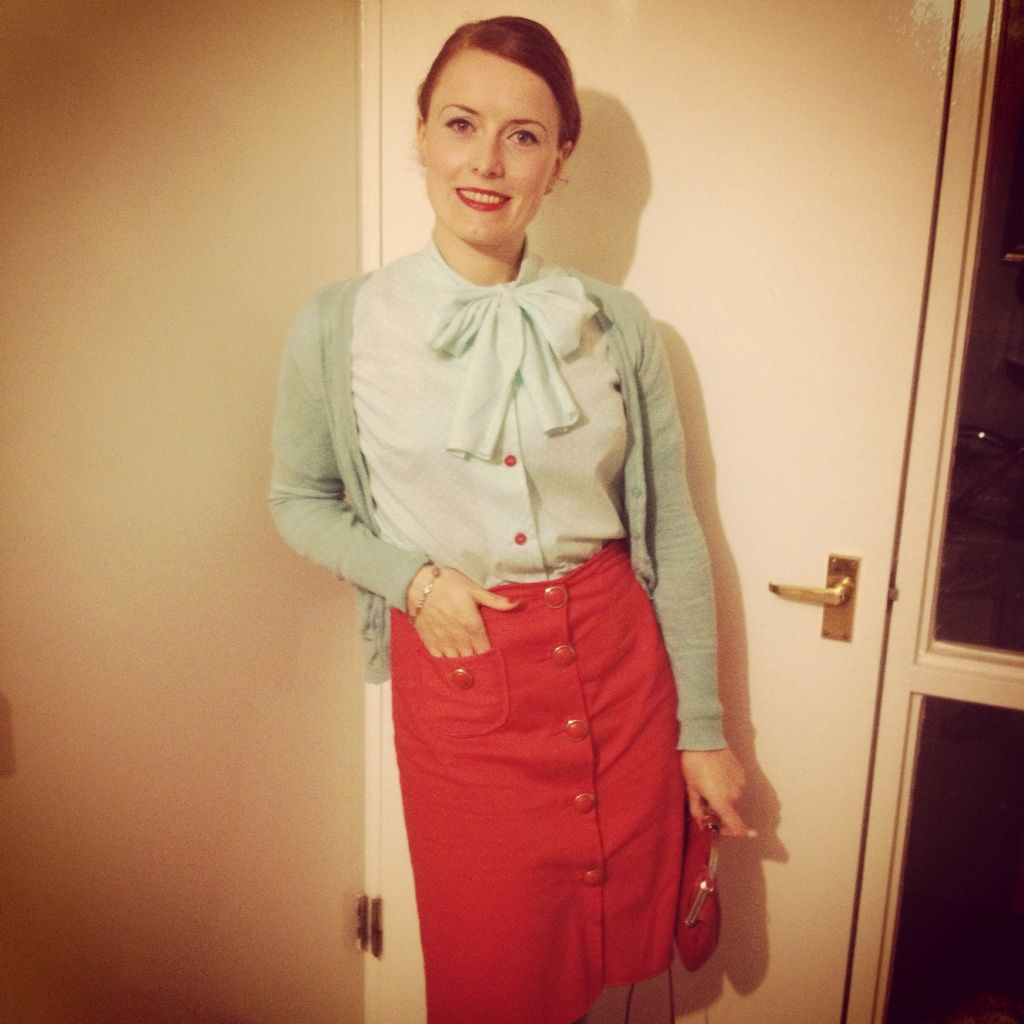
More pussy bow blouses, sorry guys what can I say, its one of my favourite styles. This time I used a vintage pattern though. So you are looking at a very different style tom the previous ones I made from my own pattern.

 
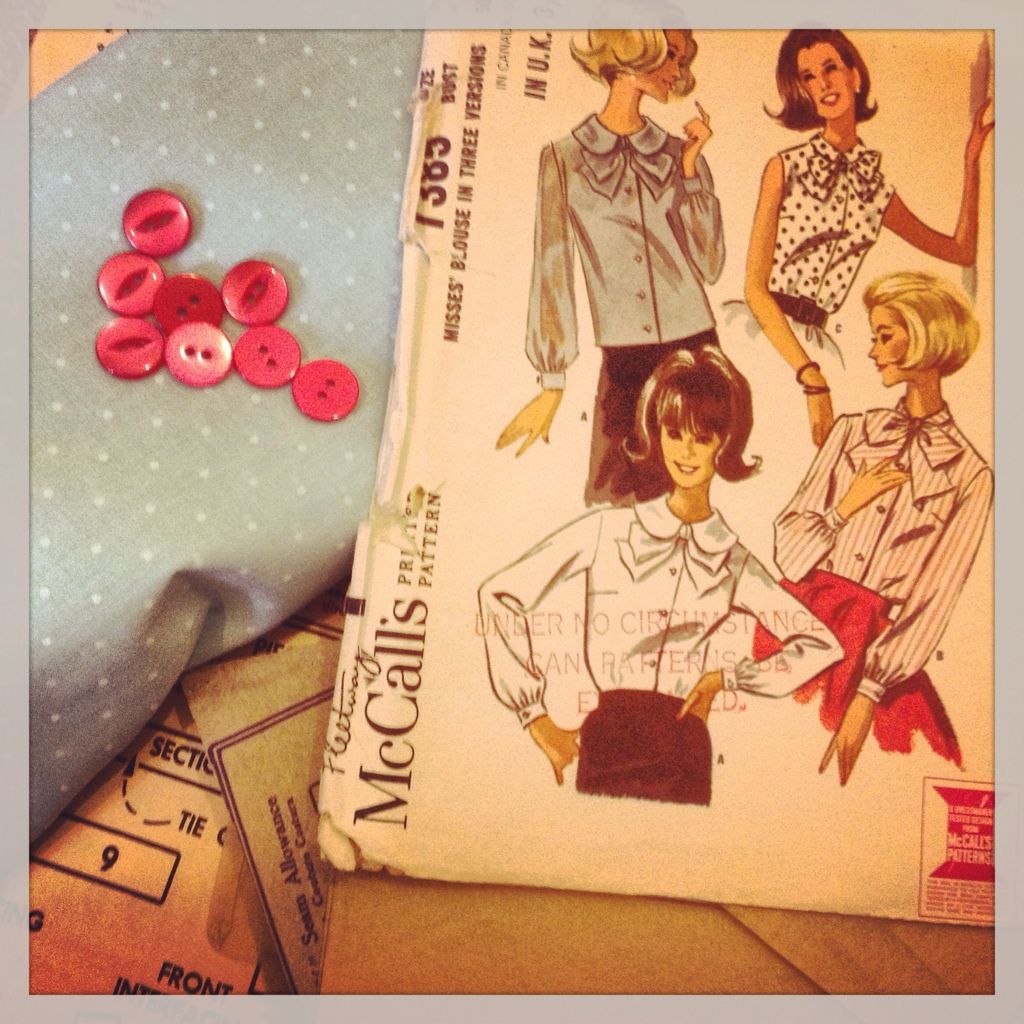
I used McCalls 7385 view B but cut short sleeves instead of the long ones. The fabric is a mint green pin spot poly cotton I already had, paired with red buttons for a (good) clashing contrast.
 
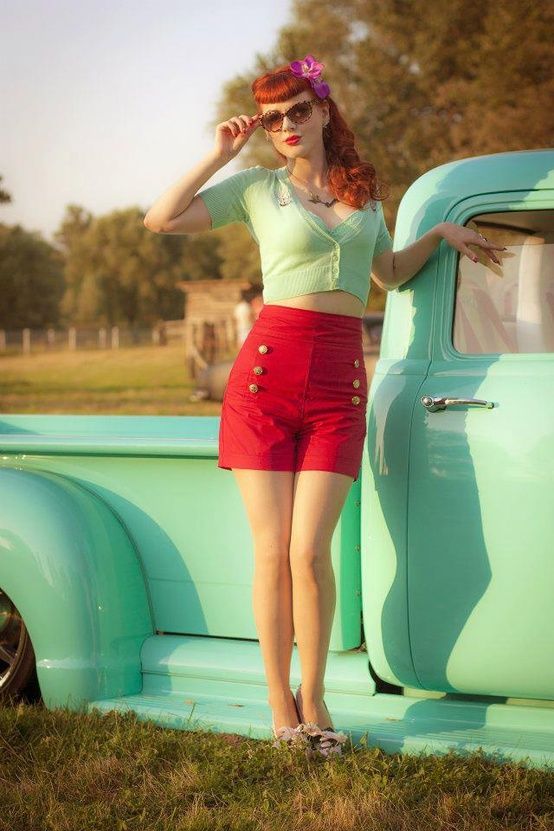
The colour combination was inspired by this picture on Pinterest.

 
I just love!!!! mint and red so I had to create an outfit incorporating those colours.
 
 
The blouse is a more boxy style and looser fit compared to my other ones but I like it just as much. I wore it out to a Burns Night dinner (sorry no tartan) so the extra room was much appreciated ;-)
 
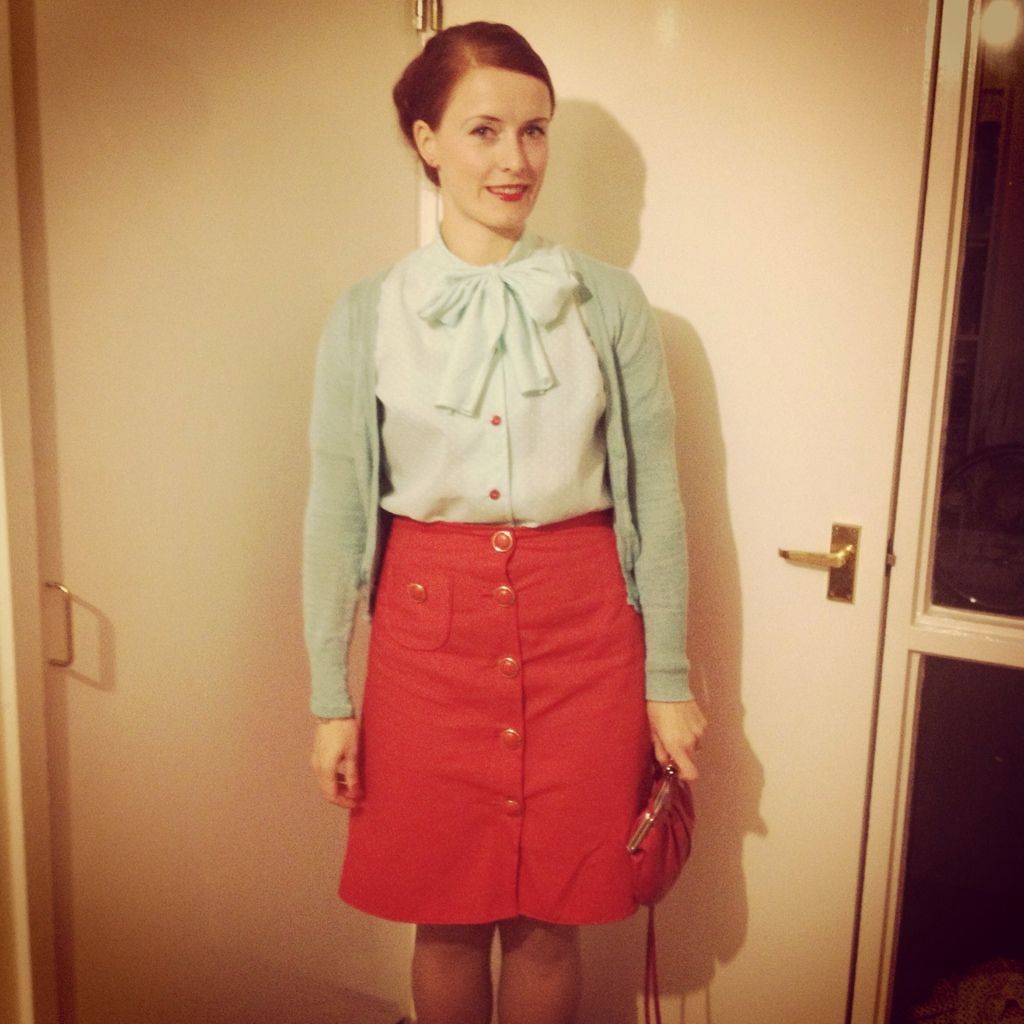
I made the skirt, too. I wanted a little more 1960s flair so I went for a buttoned down A-line style and added a pocket and huge vintage buttons for detail. I used tomato red cotton drill for the skirt.
 
 
I think this outfit will see me through Spring as well.
 
 
And until it gets warmer, I'll pair it with a cardi. I think I'd like a red one better to go with this outfit but I haven't got one (sad I know, my last red cardi got paint all over the sleeves and I haven't replaced it yet ;-((((
 
 
I hope you all had a good weekend. Any mint or red or both on your sewing table????


1/17/2013

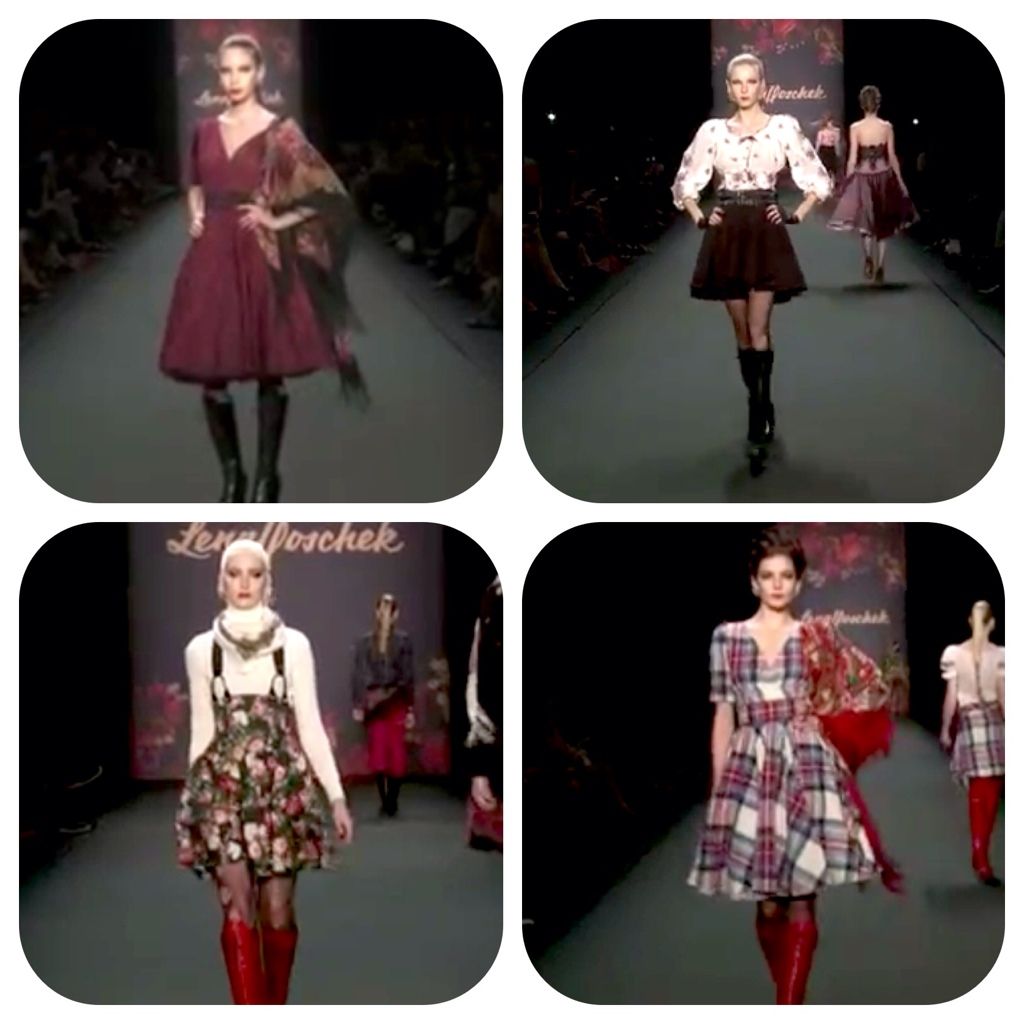
Lena Hoschek Autumn/Winter 2013

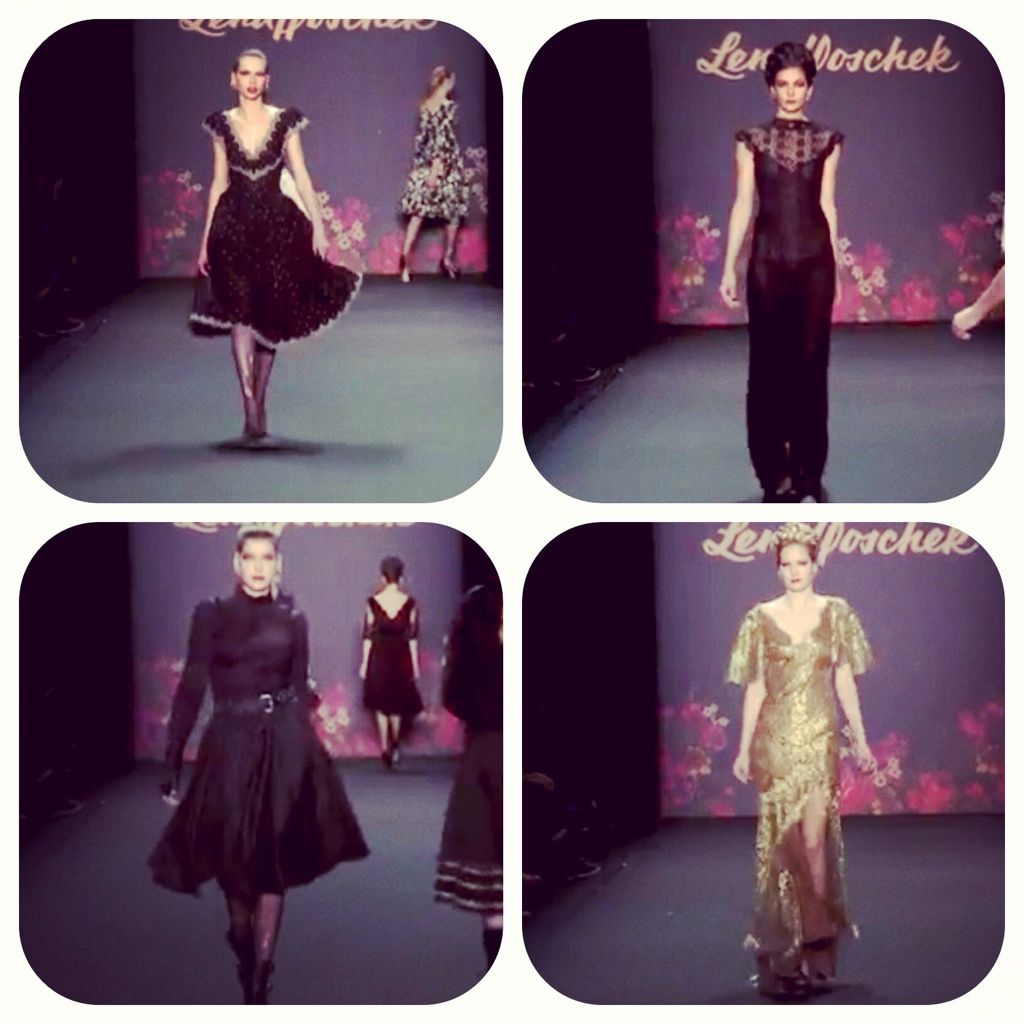
Last night I watched the Lena Hoschek Autumn/Winter 2013 fashion show at Mercedes Benz fashion week in Berlin. As always, I am a fan of most of her collection. Lena Hoschek is one of my favourite designers. I think you can guess that.
This collection is drifting a little away from her usual all retro style and includes some punk elements (you can tell she has worked for Vieveienne Westwoos in the past) but not too far for me to still love it.
See for yourself:
 
 
 Some of my favourite looks:


I am always on the look out for inspiration and new designers (or new to me designers).
Any sugestions? Who/What inspires you?

11/13/2012

The Judith apron (including tutorial), cute little Christmas gift idea

 
My friend Judith started sewing a little while ago and really got into it. I am always excited when any of my friends pick up sewing as a hobby as I love to see what ideas other people come up with and the things they create.
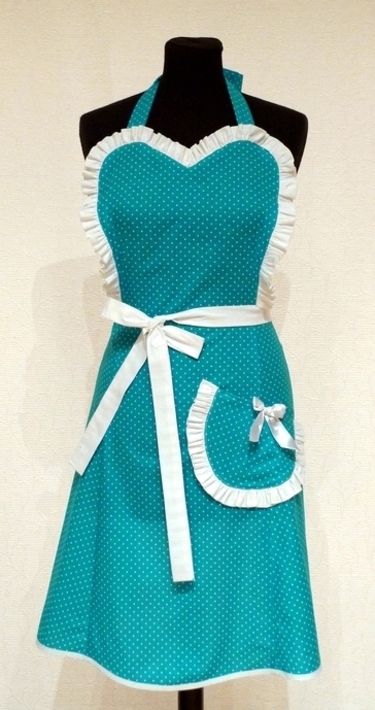
A couple of weeks back Judith asked me if I could help her figure out how to recreate an apron she had seen, for her friend. She would like to make it as a Christmas present for her and didn't know where to start. I thought that was a very sweet idea and I liked the look of said apron myself which led me to making myself one, taking a few pictures along the way for Judith.
Since Christmas is sort of around the corner for anyone planing to make any presents by hand, I thought I'd share her "tutorial" here. I hope this is helping a few of you readers who are still thinking about what to make for Christmas. It's a good beginners project.
 
This is the picture of the apron Judith wanted to recreate. 
 
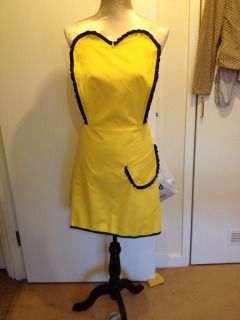
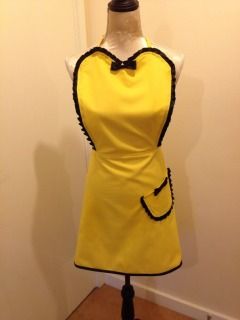
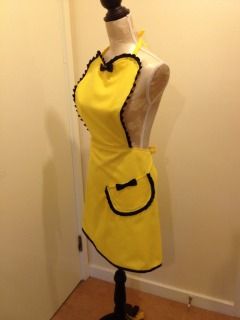
I used this opportunity for some fabric stash busting and went for a yellow and black colour combination.
 
my version. I hope you can read the measurements. Please adjust where necessary.


I am not very good with fancy computer stuff, so I hope a picture of what pieces to cut helps. I think the original apron is cut as one piece or a middle piece and two side pieces but this layout was the most economical for my fabric scraps and the end result looks the same.
The measurements I used
Top:
 12.5" long at center fold
5"wide at waist (for a total of 10")
6.5" wide at the top
I drew the sweetheart free hand

Skirt:
12.5" wide at waist
18" wide at hem
19"long

I drew the pocket free hand, the size I wanted it to be
 
 
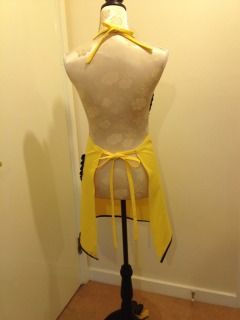
I cut the top on the fold, as well as the "skirt" piece. Not pictured in the pattern are the straps I made from the same fabric. I cut 5cm wide and 50 cm long rectangles (two for the waist strap and one for the neck strap that I cut in half) for that but you could just use ribbon instead. It's less work and works just as well. I just ran out of ribbon.
 
I used about 1/2m (140cm wide) cotton drill, 2m of 2" satin ribbon (more if you want to use it as  and some black bias tape that I had left. This is a very inexpensive project (depending on the fabric you use).
 
Cut out your pieces.
 
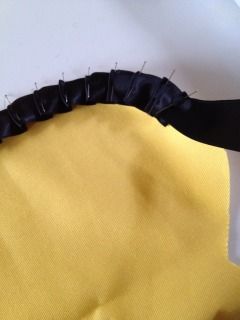
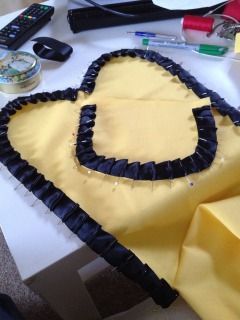
Top with pleated detail: Pin your ribbon onto the top piece around the sides and sweetheart neckline. The right side of the fabric is facing up and you pin all the way around the outside. You can buy pre-pleated ribbon for that. My shop didn't have any so I had to pleat it myself.
 
 
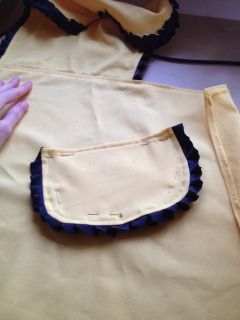
pleat all the way around the pocket, too
 
 
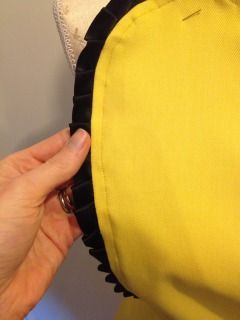
Stitch all the way around about 1cm from the outer edge. I also zig zagged the raw edges (you can do that before pinning the ribbon on, too. I find doing it after sewing on the ribbon reduces the bulk a bit and also secures the ribbon even more.
 
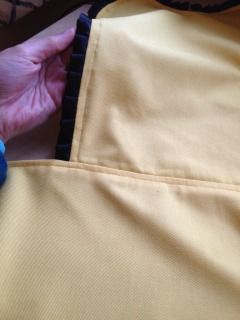
Then fold the ribbon edge around to the back and press. Topstitch all the way around et voila, you have a rushed finish.
 
 
 Now overlock or zig zag the waist line- edge of your top piece and also the upper edge/waistline of your "skirt" piece.
Pin the top piece to the skirt piece along the waistline (center lines matching, right sides of the fabric facing) sew both pieces together and press seam allowance toward the skirt. Top stitch along the waist of the whole "skirt" for a nice finished edge.


Now you are almost done.

Place your pocket where you would like it to be, pin in place and sew. Hem the sides of the "skirt" and the hem. I finished my hem with bias tape in black to pick up the fabric one more time. You can also apply the pleating as on the bodice to add any other trim.


All that's missing now is the ties and a few finishing touches.


I made my own straps. You can either cut strips of fabric the width and length you want plus hem allowance and sew a double folded narrow hem all the way around.

Or you can cut the strips double the width of the strap plus seam allowance, fold then lengthwise (right sides of fabric facing) and sew along the long side and one of the short sides. Turn them inside out, press and ta da, you have a strap.

Attach to the top and skirt and you are done. Add bows and other details if you wish and you have your finished apron.


I am not very good at explaining things, hence I never do tutorials. I am lacking the teacher-patience-gene I guess. Thankfully this is a very straight forward project so I hope it all makes sense, especially to beginners, who have not made any clothing yet.
Please send me a picture or a link to your blog if you are making an apron like this. I'd love to see how they turn out.